
Your toilet takes three full minutes to refill after flushing. You know this because you’ve timed it. Twice. And now every time someone flushes, you hold your breath hoping guests don’t notice the faint, pathetic trickle coming from the tank. Been there. Trust me, I’ve been there.
A slow-filling toilet is one of those problems that feels minor until it isn’t. It wastes water, it’s annoying, and — left alone — it can quietly turn into a flooded bathroom floor at 2 a.m. I learned that last part the hard way after ignoring a sluggish fill valve for about four months longer than any reasonable person should have.
The good news? This is almost always a DIY fix. No plumber required. Most repairs cost under $20 and take less than an hour, even if you’re not particularly handy. Here’s everything I know about diagnosing and fixing a slow-filling toilet tank.
Why Is My Toilet Filling So Slowly? (The Root Causes)
Before you start yanking things apart, it helps to know what you’re dealing with. In my experience, a slow-filling toilet comes down to one of four culprits:
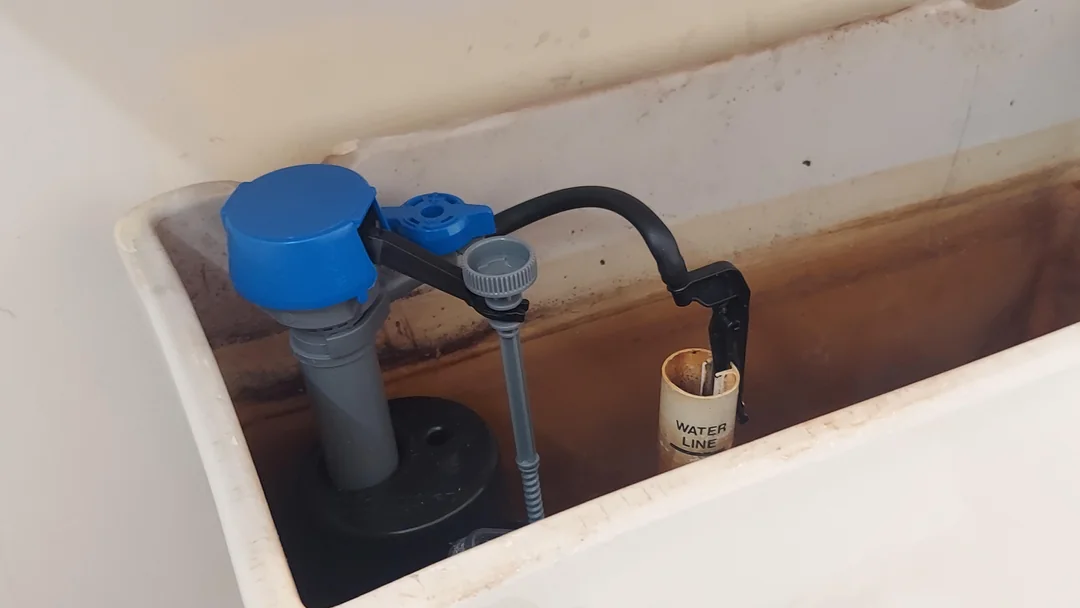
1. A faulty or worn-out fill valve — This is the most common cause, full stop. The fill valve is the vertical tower inside your tank that controls water flow. Over time, the rubber seals inside it degrade, get clogged with mineral deposits, or just give up. When that happens, water barely trickles in instead of rushing.
2. A partially closed or damaged water supply valve — That little oval valve behind and below your toilet? If someone partially shut it off (maybe during a repair years ago) and never fully reopened it, you’re running on restricted flow. This is the first thing I check because it takes about four seconds to diagnose.
3. Low water pressure from the main supply — Less common, but if multiple fixtures in your home have weak flow, your house-wide water pressure might be the issue. A pressure gauge from any hardware store will tell you if you’re below the 40–60 PSI sweet spot.
4. A clogged or kinked supply line — The braided metal hose connecting the wall to your toilet tank can accumulate sediment, especially in homes with older pipes or hard water. A kink in a cheap plastic supply line can also choke flow down to almost nothing.
Step-by-Step: How to Fix a Slow-Filling Toilet
Step 1: Check the Water Supply Valve First
I can’t tell you how many times I’ve watched someone spend $40 on a new fill valve when the fix was literally reaching behind the toilet and turning a valve a quarter-turn to the right. Don’t skip this step just because it seems too simple.
Locate the supply shutoff valve — it’s usually on the wall or floor directly behind the toilet. Turn it counterclockwise (lefty-loosey) to make sure it’s fully open. If it’s already fully open and stiff, that’s fine. But if it moves more than you expected, that was probably your whole problem.
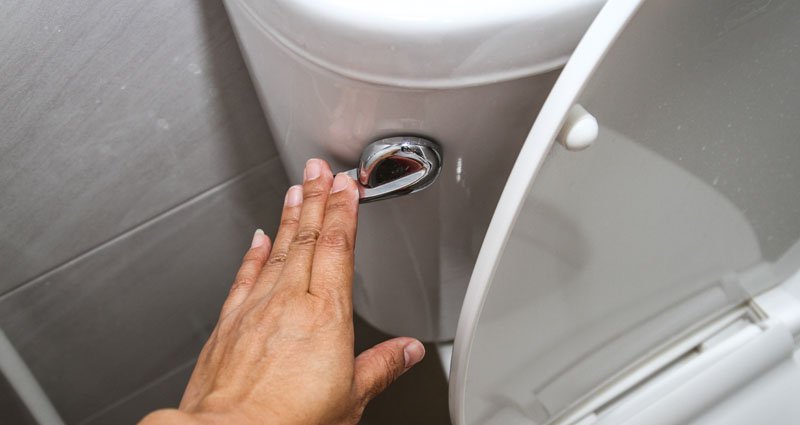
After opening it, flush and watch the tank refill. If it now fills in 60–90 seconds, congratulations, you’re done. Go have a coffee and think about how you just saved yourself $150 in plumber fees.
If the valve won’t turn smoothly or feels corroded, that valve itself might need replacing. They run about $8 at any hardware store and swap in minutes — just shut off the main water supply first.
Step 2: Inspect and Clean the Fill Valve
If the supply valve is fine, your fill valve is almost certainly the problem. Here’s how to check it without making a mess.
What you’ll need:
- Adjustable pliers
- A small cup or sponge
- White vinegar
- Maybe a new fill valve (Fluidmaster 400A — about $12 — is the one I’ve used for 15 years and I’d recommend it to anyone)
Here’s the process:
- Shut off the water supply valve behind the toilet.
- Flush to empty most of the tank.
- Use a sponge or cup to remove the remaining water.
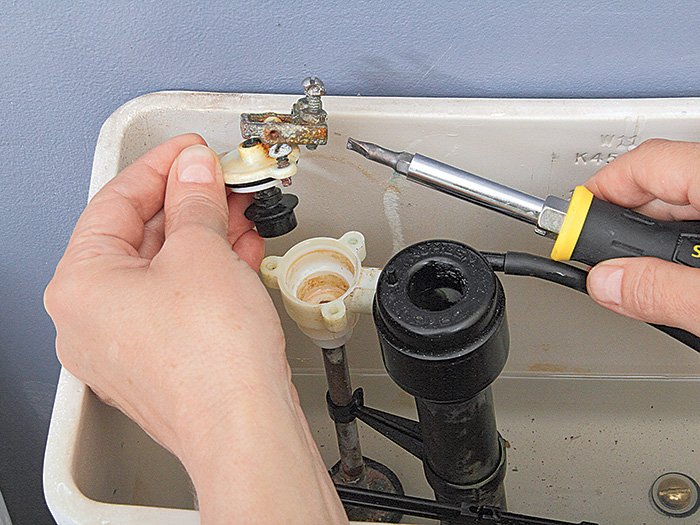
- Unscrew the top cap of the fill valve (it usually twists off counterclockwise by about an eighth of a turn).
- Hold a cup over the open valve top, then have someone briefly turn the supply back on for one second. This blasts any debris out of the valve seat.
- Reassemble, turn the water back on, and see if the fill speed improved.
If that blast of water didn’t help, the fill valve diaphragm or seal is likely toast. At that point, I always just replace the whole valve. Trying to source individual replacement seals for a $12 part is a waste of an afternoon.
Step 3: Replace the Fill Valve (It’s Easier Than It Sounds)
Replacing a toilet fill valve is genuinely one of the easiest plumbing jobs in a house. I’ve done it in maybe 15 minutes flat, including the time I spent looking for my channel-lock pliers.
- Shut off the supply valve and flush to drain the tank.
- Disconnect the supply line from the bottom of the tank. Have a towel ready — there will be a little water.
- Unscrew the locknut holding the fill valve in place (it’s the plastic nut underneath the tank). Turn counterclockwise.
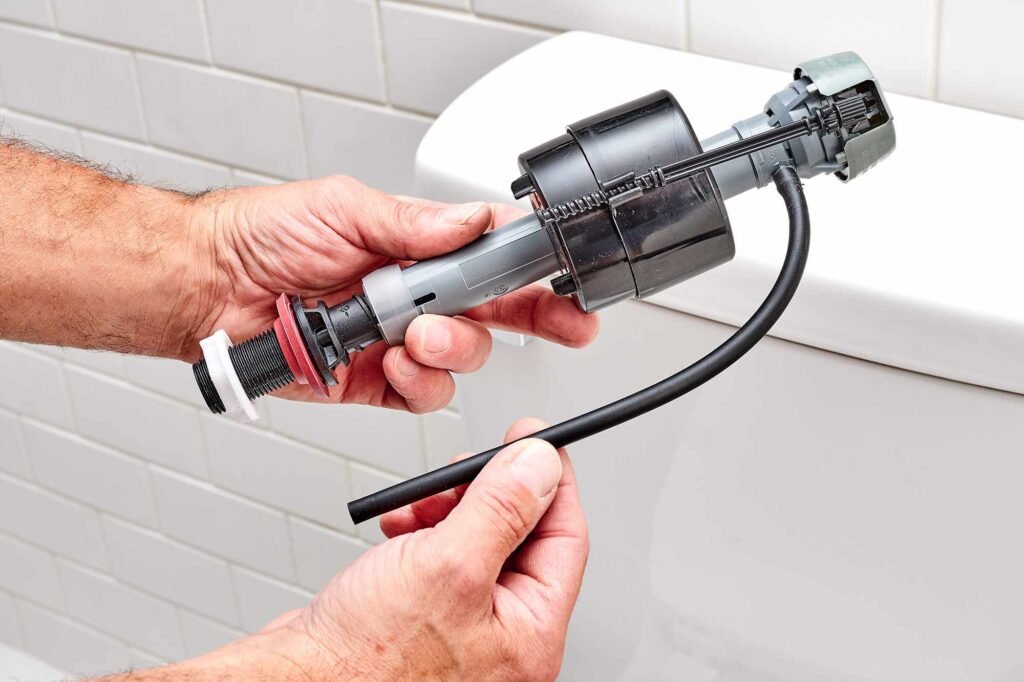
- Pull the old fill valve straight up and out.
- Drop the new fill valve in. The Fluidmaster 400A has a simple clip adjustment to set the height — you want the critical water level mark about an inch below the top of the overflow tube.
- Hand-tighten the locknut from below, then give it a quarter-turn with pliers. Don’t overtighten — you’ll crack the tank.
- Reconnect the supply line. Turn the water on slowly.
Watch the tank fill. You’re looking for a brisk refill that takes 60–90 seconds. If you’ve got that, you’re golden.
Step 4: Check and Replace the Supply Line
If your new fill valve still fills slowly, swap out the supply line. This is the braided hose between the shutoff valve and the bottom of the tank. They’re cheap — a 12-inch braided stainless line runs about $6 — and a clogged or kinked one can strangle water flow as badly as a bad fill valve.
Turn off the supply, disconnect both ends (the valve end and the tank end), and hold it up to a light. If it’s kinked, cracked, or you can see visible sediment buildup, throw it away. Installing the new one is just a hand-tighten plus a quarter-turn with pliers on each end. Done.
I’ve found that cheap plastic supply lines — the white or gray bendy ones — are a total waste of money, even if they look fine on Pinterest-worthy bathroom renovation posts. Spend the extra three dollars and get braided stainless. The plastic ones kink, crack, and eventually fail in ways that are much more exciting than they should be.
Step 5: Test Your Home Water Pressure
If you’ve replaced the fill valve and supply line and your toilet is still filling at a glacial pace, you may have a whole-house pressure problem. This is especially likely if you’ve also noticed weak shower pressure or slow-filling sink faucets.
Pick up a water pressure gauge at any hardware store for about $10. Screw it onto an outdoor hose bib and check the reading. Anything below 40 PSI is considered low and can affect toilet fill time significantly.
If your pressure is low, the fix might be as simple as adjusting your pressure regulator (a bell-shaped device usually near where the main line enters your house). There’s a central adjustment screw you can turn clockwise to increase pressure. I’d suggest bumping it up in small increments and re-testing. If you don’t have a pressure regulator, or the one you have is failing, that’s probably a call-a-plumber situation — but at least you’ve diagnosed it yourself.
The Real Talk: What Can Go Wrong (and What’s Not Worth Your Time)
Let me be straight with you here. Most slow-filling toilet repairs are painless. But there are a few ways things can go sideways, and I’d rather warn you now than have you discover them at 10 p.m. on a Sunday.
Cracked tanks are a toilet death sentence. If you’re overtightening that fill valve locknut and you hear a crack, stop. A hairline crack in a porcelain tank will slowly leak onto your floor, usually in a direction you won’t notice until there’s water damage under your subfloor. Hand-tight plus a quarter-turn is all you need. I learned this when I was overly enthusiastic with my channel-locks on a guest bathroom project and spent the next weekend replacing an entire toilet.
Mineral buildup can be brutal in hard water areas. If you’ve got hard water and your fill valve looks like it’s coated in white chalk, you may need to soak the valve cap and internal parts in white vinegar for 30 minutes before that debris-blasting trick works. In extreme cases, the buildup is so bad inside the supply line that no amount of flushing clears it — just replace the line.
Don’t bother rebuilding old ball-cock valves. If your toilet is old enough to have a ball-cock fill valve — that’s the classic horizontal float arm with a ball on the end — don’t waste your time trying to rebuild it with a repair kit. Those kits look great on the hardware store shelf and are a total headache in practice. Just replace the entire assembly with a modern fill valve. Your future self will thank you.
The “ghost flush” trap. While you’re in there, check whether your toilet randomly runs or refills on its own. That’s usually a leaky flapper — a separate issue, but one worth fixing at the same time. A leaky flapper can actually create the illusion of a slow fill by constantly draining the tank. I once spent an hour troubleshooting a “slow-fill” problem before realizing the tank was just emptying itself every 20 minutes.
Bonus Tip: Set the Float Level While You’re at It
Since you’ve already got the tank open, take 60 extra seconds to check your float height. On a Fluidmaster-style valve, there’s a clip on the side you can slide up or down. The water level in the tank should sit about an inch below the top of the overflow tube.
If the water is too high, it runs constantly over the overflow tube — wasting water and making that hissing sound you’ve been blaming on “old pipes.” Too low, and your flush won’t have enough power. This tiny adjustment costs nothing and can solve two problems at once.
Parting Wisdom: Don’t Let Small Toilet Problems Become Big Ones
A slow-filling toilet is your plumbing trying to tell you something. Most of the time, it’s a $12 fill valve or a $6 supply line talking. The work itself takes less time than the average home improvement YouTube tutorial you’ll watch beforehand.
The worst thing you can do is ignore it. Worn fill valves eventually fail completely. Supply lines eventually burst. And neither of those scenarios is fun to come home to.
My honest advice: if your toilet is more than 10 years old and you’re already swapping the fill valve, go ahead and replace the flapper too while you’re at it. They’re $5. A whole toilet tune-up — new fill valve, new flapper, new supply line — will run you about $25 in parts and an hour of your Saturday morning. That’s cheap peace of mind.
Have you tackled a slow-filling toilet before? Did you find something I didn’t cover here — maybe a weird mineral buildup situation or a pressure regulator fix that worked wonders? Drop your experience in the comments below. I read every one, and honestly, some of the best tips I’ve ever learned came from readers who had already made the mistake I was about to make.