
That damp spot on the bathroom floor, right at the base of your toilet, is not your imagination. And no, it’s not “just condensation,” no matter how badly you want it to be. If your toilet rocks a little when you sit down, or you catch a whiff of something sour every time you walk past the bathroom, your wax ring is toast.
I get it. The idea of pulling a full toilet off the floor sounds like a job for a plumber with a truck full of tools and a bill to match. But here’s the truth: replacing a wax ring is one of the most beginner-friendly plumbing repairs out there. I’ve walked half a dozen neighbors through this exact job over the phone, and every single one of them finished it in an afternoon.
My own wake-up call came when I noticed the linoleum around my downstairs toilet had gone soft and spongy near the base. Turns out the wax ring had been failing for months, quietly soaking the subfloor underneath. What could’ve been a $15 fix turned into a weekend of cutting out rotten plywood. Don’t be like me. Catch this early and it’s genuinely one of the easiest repairs in the whole house.
What Is a Toilet Wax Ring (And Why It Fails)
A wax ring sits between the base of your toilet and the flange (the pipe fitting sticking up out of your bathroom floor). It’s job is simple: create a watertight, airtight seal so waste water goes down into the pipe instead of leaking out onto your floor.
Wax rings don’t last forever. Most manufacturers rate them for 20 to 30 years under normal use, but “normal” is doing a lot of heavy lifting in that sentence. A few things speed up the breakdown:
- Age and dried-out wax. Old wax gets brittle and loses its ability to compress and seal properly.
- A rocking or unstable toilet. Every wiggle breaks the seal a little more, like flexing a paperclip until it snaps.
- A damaged or improperly set flange. If the flange sits too high or too low relative to the floor, the wax ring can’t do its job no matter how fresh it is.
- Previous bad installs. If someone before you skimped on the wax ring or set the toilet crooked, you’re inheriting their mistake.
Signs Your Wax Ring Is Leaking
Before you go pulling your toilet apart, make sure the wax ring is actually the problem. I’ve seen people chase a “wax ring leak” for weeks when the real issue was a cracked tank or a loose supply line. Here’s what actually points to a bad wax ring:
- Water pooling at the base of the toilet. This is the big one. If you see moisture specifically where the toilet meets the floor, that’s your smoking gun.
- A rocking or unstable toilet. Grab the seat and gently rock the bowl side to side. Any movement means the seal underneath is compromised or the bolts have loosened.
- A persistent sewer smell in the bathroom. A failed wax seal lets sewer gas escape right along with the water, and that smell doesn’t go away with candles or sprays.
- Stains or soft spots on the ceiling below (if you’ve got a bathroom on the second floor). This means the leak has been going on long enough to soak through the subfloor.
- Discolored or damaged flooring around the toilet base. Vinyl, laminate, and even tile grout will show water damage over time.
If you’re seeing two or more of these, order a new wax ring today. Seriously, don’t wait on this one.
Tools and Materials You’ll Need
You don’t need a plumber’s van full of gear for this. Here’s my actual shopping list:
- New wax ring (I’ll get into which type below)
- Adjustable wrench
- Putty knife or old chisel
- Rags and old towels
- Rubber gloves
- Bucket or wet-dry shop vac
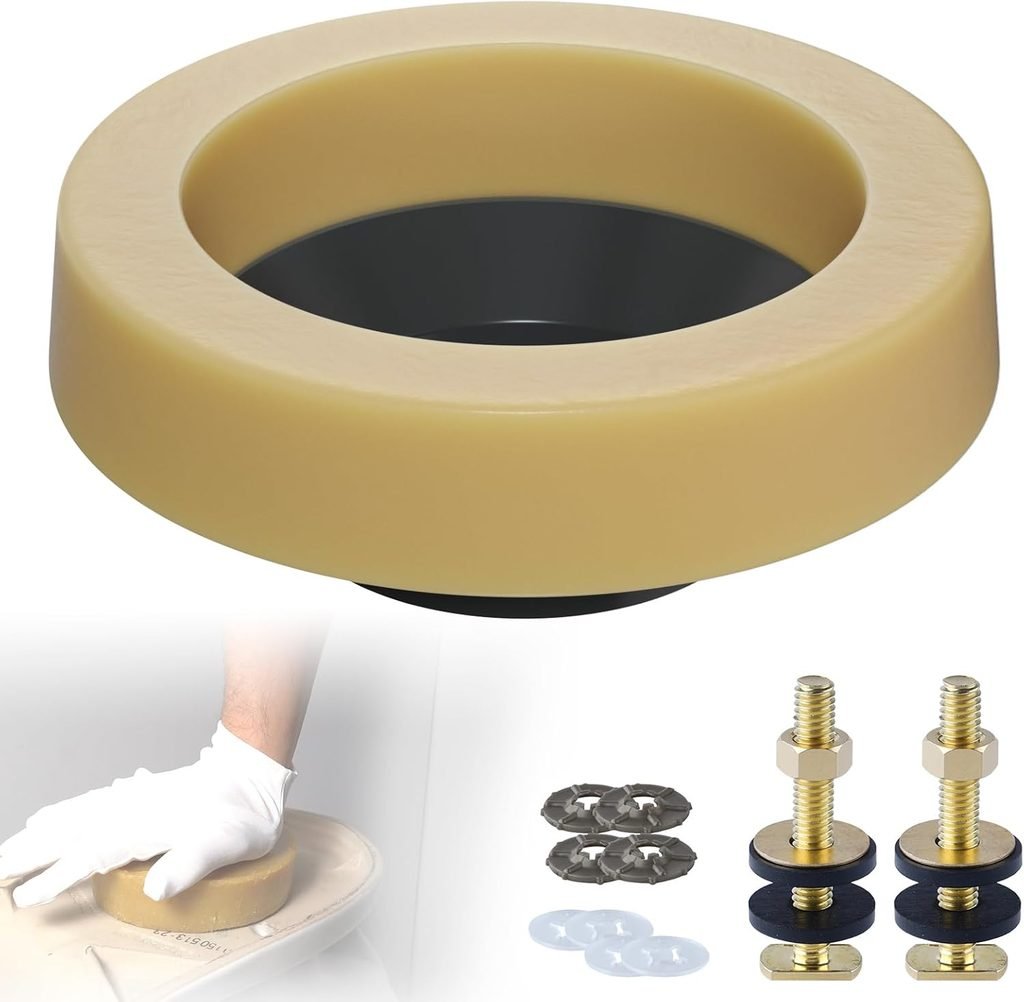
- New toilet bolts and a wax ring kit (cheap insurance)
- Plumber’s putty or silicone caulk
- A helper, if you can rope one in (toilets are heavier and more awkward than they look)
Quick side note: grab a small tube of caulk while you’re at the hardware store, even if you don’t think you’ll need it. You’ll want to seal the base of the toilet to the floor once it’s back in place, and running out mid-project is annoying.
Choosing the Right Wax Ring for Your Toilet
Not every wax ring is created equal, and picking the wrong one is a rookie mistake I made on my first attempt.
- Standard wax ring: This works for most setups where the flange sits flush with or slightly above the floor. It’s the cheapest option and works fine in the majority of homes.
- Extra-thick or double wax ring: If your flange sits below floor level (common after a new tile or flooring install raised the floor height), you need the thicker version. Otherwise you won’t get a proper seal, and you’ll be back here in a month wondering why it’s leaking again.
- Waxless (rubber) seals: These have gotten popular in the last few years, and honestly, I’ve found them to be a total waste of money for most standard installs, even though they look slick and mess-free on the shelf. They work fine, but they cost three or four times as much as a wax ring for a job a two-dollar ring already handles beautifully. Save the money unless you’ve got a specific reason to avoid wax, like reinstalling the same toilet repeatedly for other repairs.
How to Replace a Toilet Wax Ring: Step-by-Step
Step 1: Turn Off the Water and Drain the Tank
Shut off the water supply valve behind the toilet (turn it clockwise). Flush the toilet to empty the tank, then hold the handle down to get out as much water as possible. Use a sponge or old towel to soak up whatever’s left in the tank and bowl. You want this thing as dry as possible before you tip it.
Step 2: Disconnect the Water Supply Line
Unscrew the supply line from the bottom of the tank using your adjustable wrench. Keep a rag handy because a little water always escapes here, no matter how careful you are.
Step 3: Remove the Toilet Bolts
Pop off the plastic caps covering the bolts at the base of the toilet. Underneath, you’ll find two nuts holding the toilet to the flange. Loosen and remove both. If they’re rusted solid (common in older bathrooms), a little penetrating oil and some patience usually does the trick. Worst case, cut them with a hacksaw.
Step 4: Lift the Toilet Off
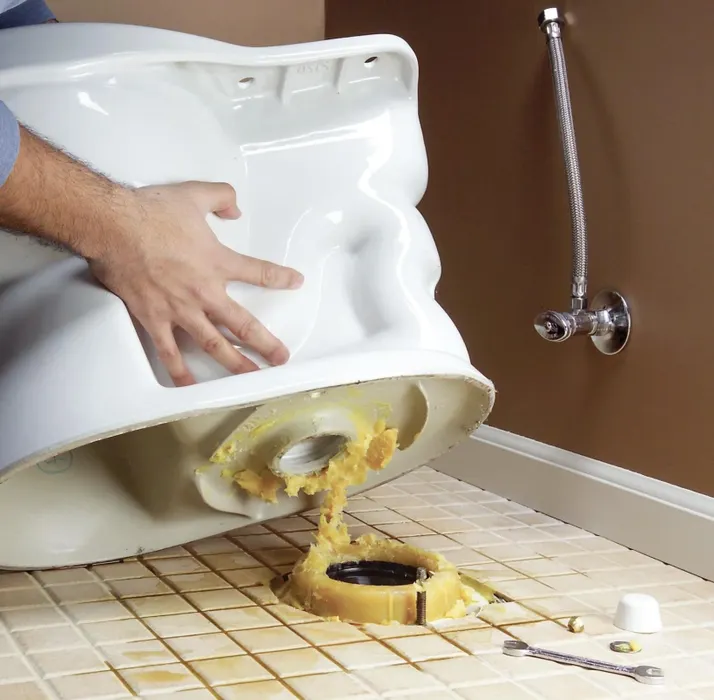
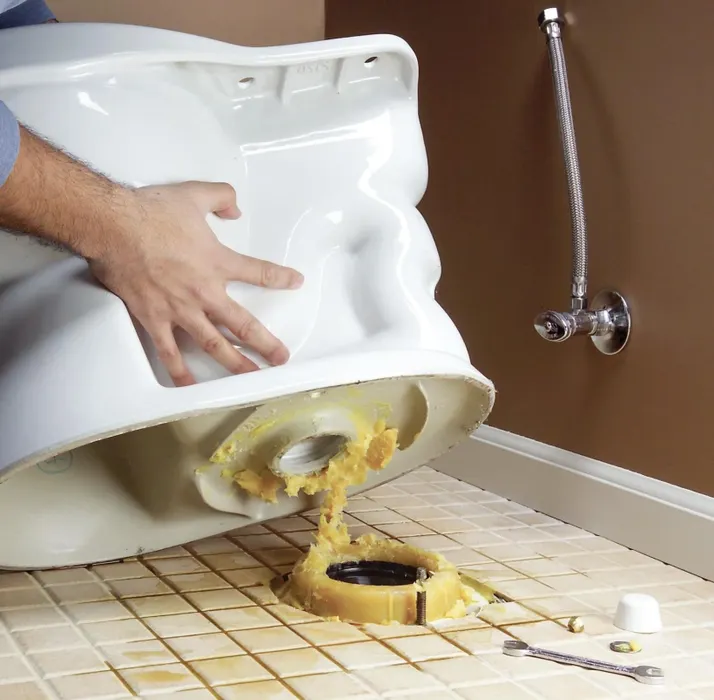
This is the part where having a helper really pays off. Rock the toilet gently to break the wax seal, then lift it straight up and off the flange. Set it down on old towels, ideally outside the bathroom or on a tarp, because the underside is going to be gross.
Immediately stuff a rag or old towel into the now-open flange opening. This blocks sewer gas from drifting into your bathroom while you work, and it stops anything from accidentally falling down the pipe. I cannot stress this step enough. Skip it and you’ll regret it.
Step 5: Scrape Off the Old Wax Ring
Using your putty knife, scrape all the old wax off both the flange and the base of the toilet. It’s messy and a little disgusting, but it has to be spotless before the new ring goes on. Any leftover wax will prevent a proper seal.
Step 6: Inspect the Flange
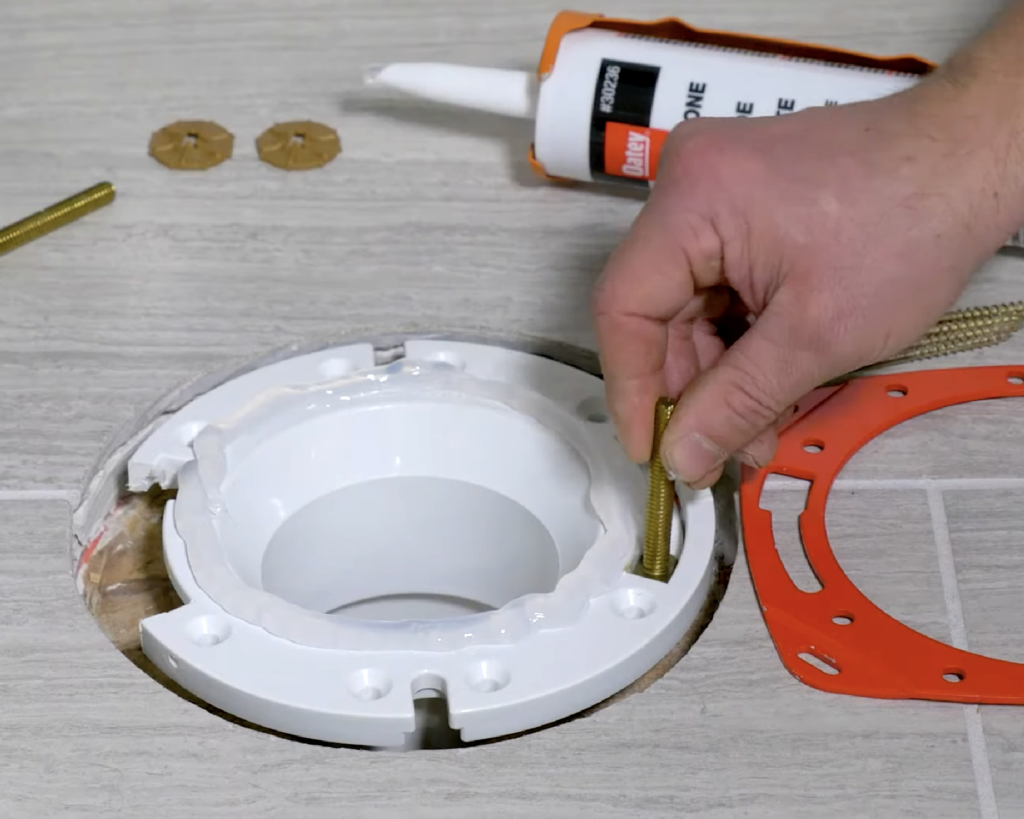
While everything’s exposed, take a good look at the flange itself. Check for cracks, rust, or a flange that sits noticeably higher or lower than the floor. This is the moment to fix flange problems, because once that toilet’s back down, you won’t be looking at this again for years.
Step 7: Set the New Wax Ring
Press the new wax ring onto the flange, wax-side down, or onto the toilet’s horn (the protruding part on the underside of the bowl) if that’s how your kit is designed. Either way works, just don’t do both, or you’ll end up with double the wax and a toilet that won’t sit flush.
Step 8: Insert New Bolts
Slide new toilet bolts into the flange slots. New bolts are cheap and it saves you from wrestling with corroded old ones down the line.
Step 9: Lower the Toilet Into Place
Remove the rag from the flange (don’t forget this step, I know someone who didn’t). Carefully lower the toilet straight down onto the bolts, lining up the holes in the base. Press down firmly and evenly with your body weight to compress the wax ring and create the seal.
Step 10: Secure and Check for Level
Add washers and nuts to the bolts and tighten by hand, then snug them with a wrench. Don’t crank them down like you’re changing a tire; over-tightening can crack the porcelain base, and cracked porcelain means buying a whole new toilet. Tighten evenly on both sides, alternating, until the toilet feels solid with zero rock.
Step 11: Reconnect the Water and Test
Hook the supply line back up, turn the water back on, and let the tank fill. Flush a few times and watch closely at the base for any sign of leaking. Run your hand along the floor around the toilet, too. If it’s bone dry after a few flushes, you’re done.
Step 12: Caulk the Base
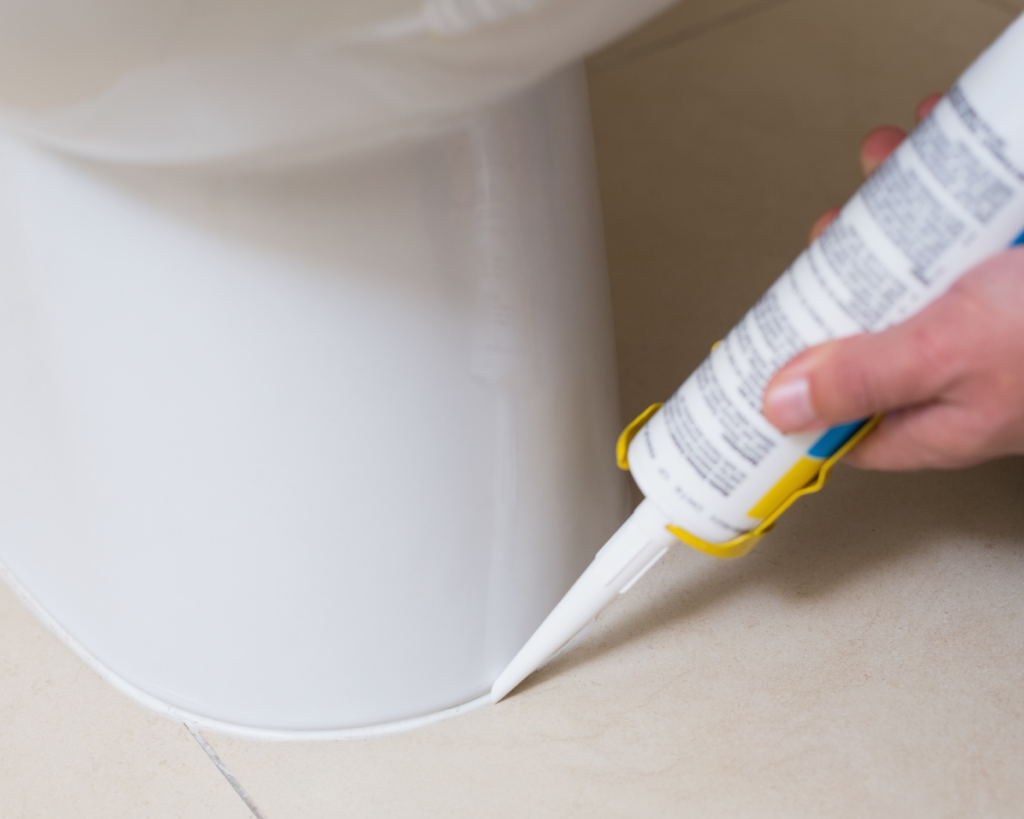
Run a bead of caulk around the base of the toilet where it meets the floor, leaving a small gap at the back. This stops water from pooling under the toilet in the future and gives you an early warning system: if you ever see water pooling on top of the caulk line instead of underneath it, you’ll know something’s wrong upstream.
Real Talk: What Can Go Wrong (And What’s Not Worth It)
Here’s where I get honest with you, because plenty of “easy DIY” articles skip this part.
- The wax ring wasn’t actually your problem. If you replace the ring and it still leaks, the issue is probably a cracked toilet base, a damaged flange, or a supply line leak masquerading as a base leak. Don’t just keep buying wax rings and hoping.
- A broken or offset flange is a bigger job. If your flange is cracked, rotted, or sitting way off from where it needs to be, that’s not a wax-ring afternoon anymore. That’s cutting into subfloor territory, and unless you’re comfortable with that kind of repair, this is genuinely the point to call a plumber.
- Rotten subfloor changes everything. If you pull the toilet and find soft, spongy, or discolored wood underneath, stop. Don’t set a new toilet on a floor that can’t support it. You’ll need to cut out and replace that section before this repair means anything.
- Over-tightening the bolts. I mentioned it above, but it deserves its own callout because it’s the single most common mistake I see. Porcelain cracks are not repairable, and a hairline crack you don’t even notice right away can turn into a much bigger leak down the road.
- Skipping the caulk isn’t the end of the world, but it’s not smart either. Some plumbers actually recommend leaving a small section uncaulked specifically so a future leak shows itself instead of hiding under the toilet. I still caulk mine, just not the entire perimeter, for exactly that reason.
Frequently Asked Questions
How often should I replace my toilet’s wax ring? There’s no set schedule. Replace it when you notice leaking, rocking, or odor, or any time you remove the toilet for another repair, like fixing a flange or replacing flooring.
Can I reuse a wax ring after removing the toilet? No. Once a wax ring has been compressed, it won’t seal properly a second time. Always use a fresh one.
How long does a wax ring replacement take? For a straightforward job with no flange issues, budget an hour to an hour and a half your first time, less once you’ve done it before.
Is it normal for the toilet to feel loose after reinstalling? No. A properly reinstalled toilet should feel completely solid with no rocking. If it’s loose, check that the bolts are tightened evenly and that the wax ring compressed correctly.
Parting Wisdom
A leaking wax ring is one of those problems that gets more expensive the longer you ignore it. What starts as a two-dollar ring and an hour of your Saturday can turn into subfloor repair, mold remediation, or a full bathroom overhaul if you let it sit. Catch it early, do the job right, and don’t skimp on the flange inspection while everything’s already exposed.
Have you tackled a wax ring replacement before, or are you staring down a wobbly toilet right now trying to talk yourself into it? Drop your questions or your own horror stories in the comments below. I read every one, and there’s a decent chance I’ve made the exact same mistake you’re about to make.