
Your bathroom vanity top is cracked, stained, or just plain ugly, and every quote you’ve gotten for a replacement makes your stomach drop. Granite installers want three figures a square foot. Quartz isn’t much better. And you’re standing there thinking, “It’s a bathroom counter, not a kitchen island, why does this cost as much as my car payment?”
I get it. I’ve stood in that exact spot, calculator app open, watching my budget evaporate before I’d even picked a color. The good news: a vanity top is a small enough surface that you can get creative without wrecking your finances. You’ve got room to experiment, take a few risks, and still walk away with something that looks like it cost way more than it did.
Here are seven ideas I’ve either installed myself or watched a client pull off beautifully, all without draining a savings account.
A quick word before we get into it: measure your vanity twice before you buy anything. I say this because I once ordered a remnant slab based on a guess instead of an actual tape measure reading, and it came up short by almost two inches on one side. That mistake cost me an extra trip and a very awkward conversation with the stone yard. Whatever route you pick below, grab a tape measure, write down the exact width, depth, and sink cutout location, and keep that number handy while you shop.
1. Butcher Block Countertops (Sealed Right)
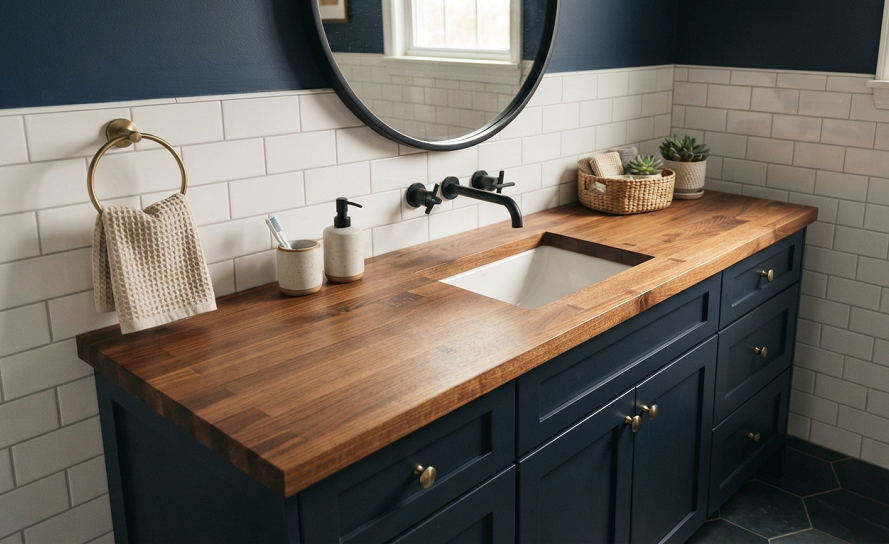
Butcher block gets a bad rap in bathrooms because everyone pictures a soggy, warped mess six months later. That fear is fair, but it’s also avoidable if you seal the wood properly.
I used a birch butcher block slab in my downstairs half bath about four years ago, and it still looks sharp. The trick is coating every single surface, including the underside and the cut edges around the sink hole, with a marine-grade polyurethane or a food-safe waterproof sealant made for wet environments. Skip the standard butcher block oil you’d use in a kitchen. That stuff is meant for food contact, not for standing water around a faucet.
Butcher block runs anywhere from $40 to $150 for a small vanity-sized piece, depending on the wood species and whether you buy a pre-cut slab or trim one down yourself. Big box stores carry pre-cut kitchen counter offcuts that are often the perfect size for a single-sink vanity, and you can sometimes find these in the discontinued or clearance bin for even less.
The warmth of real wood does something a laminate or tile top can’t. It makes a bathroom feel like a room instead of a clinical box. I’ve paired butcher block with black hardware and a vessel sink more times than I can count because the contrast just works.
One thing I’ll warn you about: humidity matters. If your bathroom doesn’t have a working exhaust fan, wood is a riskier bet no matter how well you seal it. Fix your ventilation first, then commit to the wood look.
2. Concrete Countertop Overlay
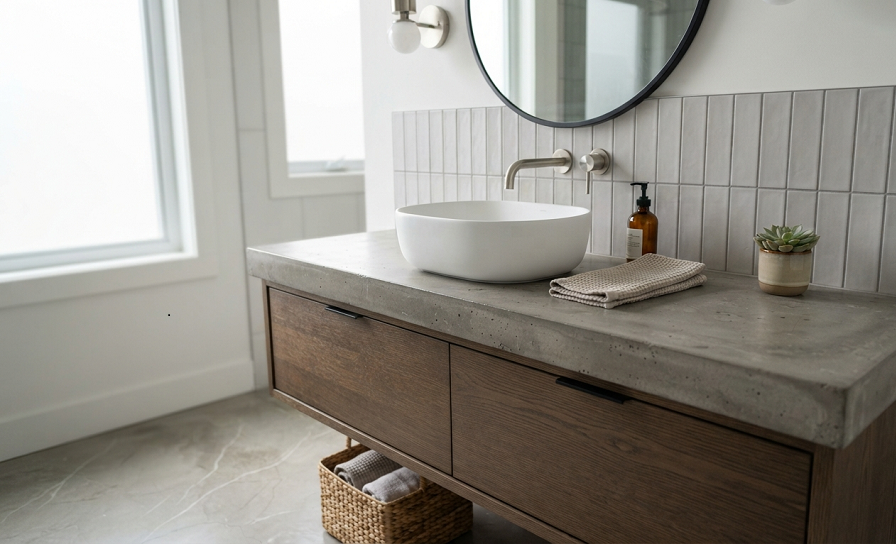
Concrete overlays are having a moment, and honestly, they deserve it. You’re not pouring a full concrete slab here. You’re applying a thin, feather-light layer of specialized concrete mix directly over your existing countertop, whether that’s laminate, cultured marble, or even old tile.
I tried this on a client’s guest bathroom that had a truly hideous pink cultured marble top from the 90s. We used a countertop resurfacing kit that ran about $75, plus another $20 for extra pigment to get the charcoal shade she wanted. Two coats, a light sand between layers, and a sealant on top, and the whole project took a weekend.
The texture you get is genuinely gorgeous. Slight variations, a little bit of that hand-troweled look, and a matte finish that photographs beautifully. It reads as high-end industrial without the industrial price tag.
Real talk on this one: concrete overlays are not forgiving of shortcuts. If you rush the curing time or skip a coat of sealant, you’ll end up with hairline cracks or a surface that stains the first time someone leaves a wet washcloth on it too long. Give it the full cure time listed on the product, even if that means using a different bathroom for a few extra days. Patience here pays off.
3. Peel-and-Stick Countertop Film
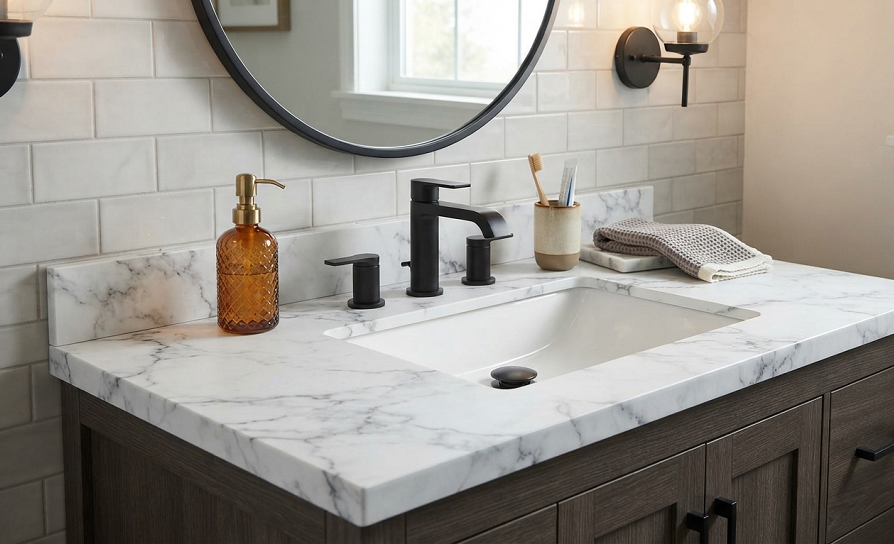
I was skeptical about this one for a long time. Peel-and-stick anything used to mean cheap-looking, bubble-prone, and destined to peel up at the corners within a month. The materials have improved a lot, and the good brands now use a textured vinyl that mimics stone with real depth.
This is the fastest and cheapest fix on this entire list. A roll big enough for a standard vanity top costs somewhere between $15 and $35, and you can install it in an afternoon with nothing more than a squeegee, a utility knife, and a hairdryer for the edges.
I used a marble-look film on a rental property vanity that had a chip and a stubborn stain no cleaner would touch. It hid both flaws completely and lasted the full two years of that tenant’s lease without lifting.
The catch is durability. This is not a permanent solution, and I wouldn’t recommend it for a primary bathroom that gets heavy daily use from a busy household. It’s a fantastic option for rentals, guest bathrooms, or a temporary fix while you save up for something more permanent. Set your expectations accordingly and you won’t be disappointed.
4. Reclaimed or Salvaged Stone Remnants
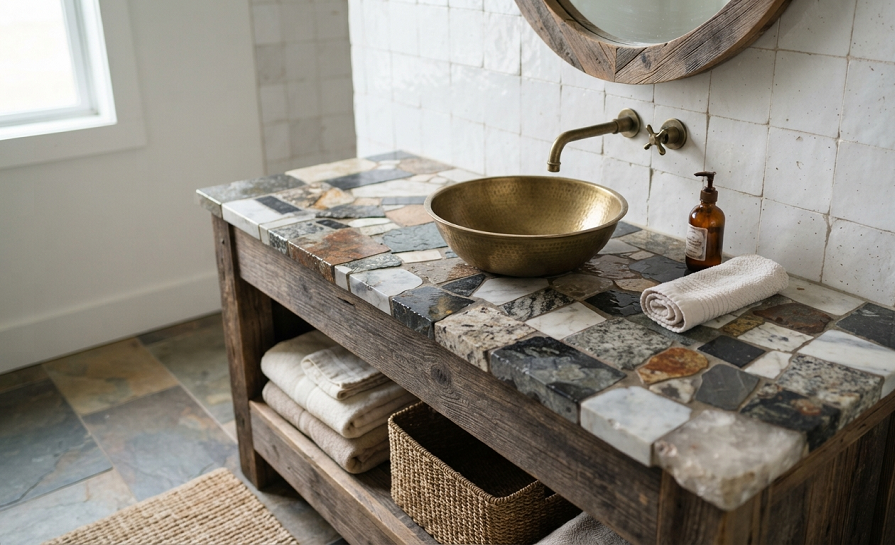
Stone yards and countertop fabricators almost always have a remnant pile out back, full of leftover pieces from bigger kitchen jobs. These offcuts are often exactly the right size for a bathroom vanity, and fabricators are usually thrilled to sell them cheap just to clear inventory.
I’ve scored granite and quartz remnants for under $100 including a rough cut, simply by calling around to three or four local fabricators and asking what they had on hand. Some shops will even throw in the edge polishing and sink cutout for a small fee since they’re already set up to do that work.
This route takes a little more legwork than ordering online. You’ll want to visit in person, since remnant availability changes constantly and photos online rarely capture the veining and color accurately. Bring a paint chip or tile sample from your bathroom so you can hold it against the stone in natural light before committing.
The payoff is real stone at a fraction of the retail price, cut specifically to your dimensions. That summer my zucchini took over the entire ZIP code, I also spent way too many weekends driving to stone yards for a client project, and I still think it was one of the smartest money-saving moves I’ve made in this business.
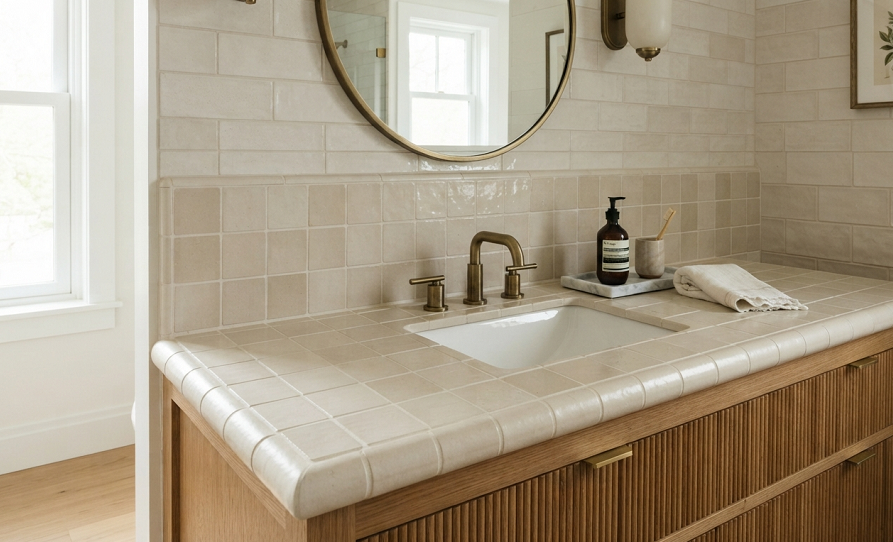
5. Tiled Vanity Top
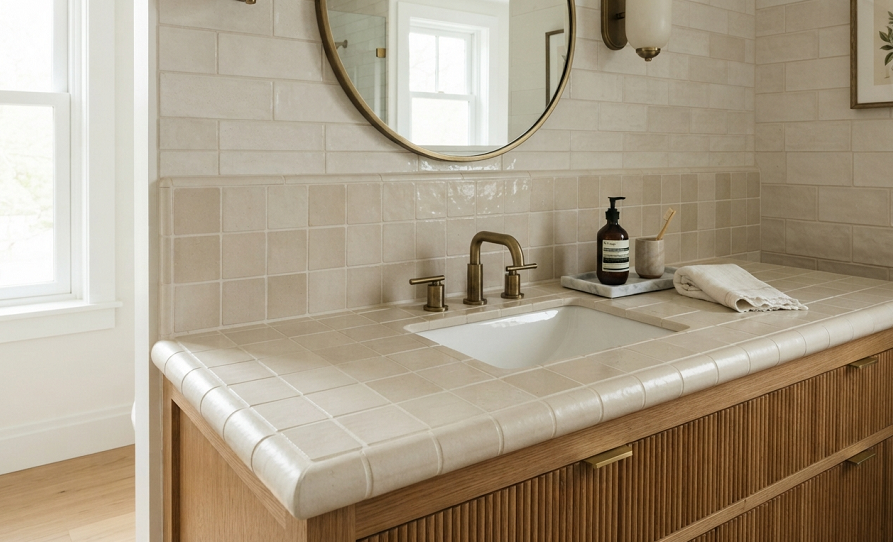
A tiled vanity top is old-school in the best way, and it’s one of the most budget-friendly options if you’re comfortable with a little DIY tiling. You’re essentially building a mini backsplash project, just laid flat instead of vertical.
Start with a plywood or cement board base cut to fit your vanity cabinet. Then tile the surface using whatever tile catches your eye, whether that’s classic penny tile, subway tile, or a bold patterned cement tile for a statement piece. Grout, seal, and you’ve got a completely custom top for the cost of tile, adhesive, and grout, usually well under $100 for a standard-sized vanity.
I did a hexagon tile top in a bold cobalt blue for my own powder room years ago, and it’s still the piece people comment on most when they use that bathroom. Tile gives you a level of pattern and color that you simply cannot get from a slab, at any price point.
Grout lines are the tradeoff here. They need to be sealed well and cleaned regularly, or they’ll pick up grime around the sink faster than a solid surface would. If you go this route, choose a darker grout color to hide the inevitable wear, and reseal it once a year.
If you want the tiled effect without the ongoing grout maintenance, choose large-format tile instead of small mosaic pieces. Fewer grout lines mean fewer places for grime to hide, and a 12×12 tile can still be cut down to fit most standard vanity dimensions with a wet saw rental from your local hardware store.
6. Recycled Glass Countertop Tiles or Slabs
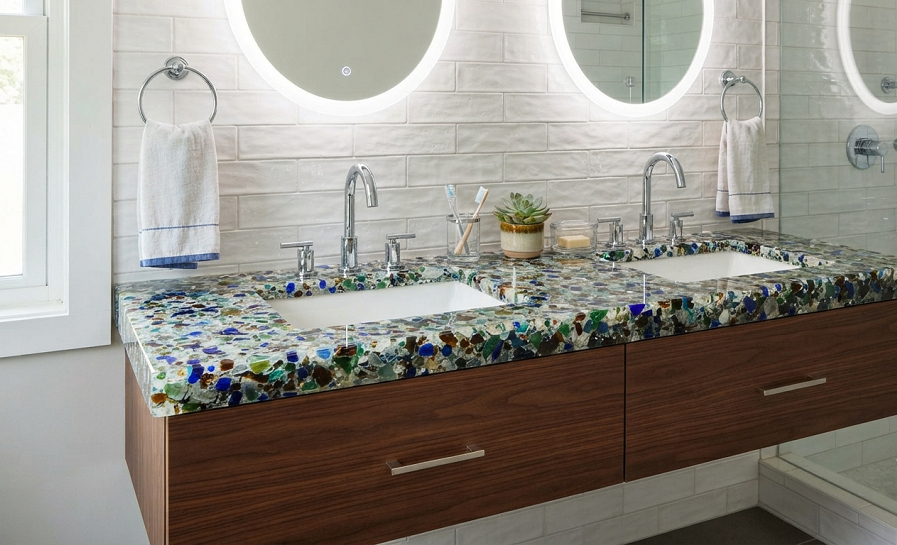
Recycled glass surfaces have gotten a lot more accessible in the past few years, and I’ve become a genuine fan. The material is made from crushed recycled glass set in a resin or cement binder, and it comes in colors and finishes that stone just cannot replicate.
Small recycled glass tiles work well for a mosaic-style vanity top, similar to the tiled approach above, and they run comparably in price. If you want a solid slab look, some manufacturers sell smaller recycled glass panels sized specifically for vanities rather than full kitchen runs, which keeps the cost down.
I installed a sea-glass green recycled glass top in a coastal-themed guest bath, and the way it catches light is genuinely different from anything else on this list. It has a soft glow to it that photographs like a much pricier material.
Sourcing can be trickier since not every home improvement store stocks it. You’ll likely need to order online or find a specialty supplier, and shipping a heavier slab can eat into your savings if you’re not careful. Compare a few suppliers and factor shipping into your total budget before you fall in love with a color swatch.
7. Painted Laminate With a Faux Finish
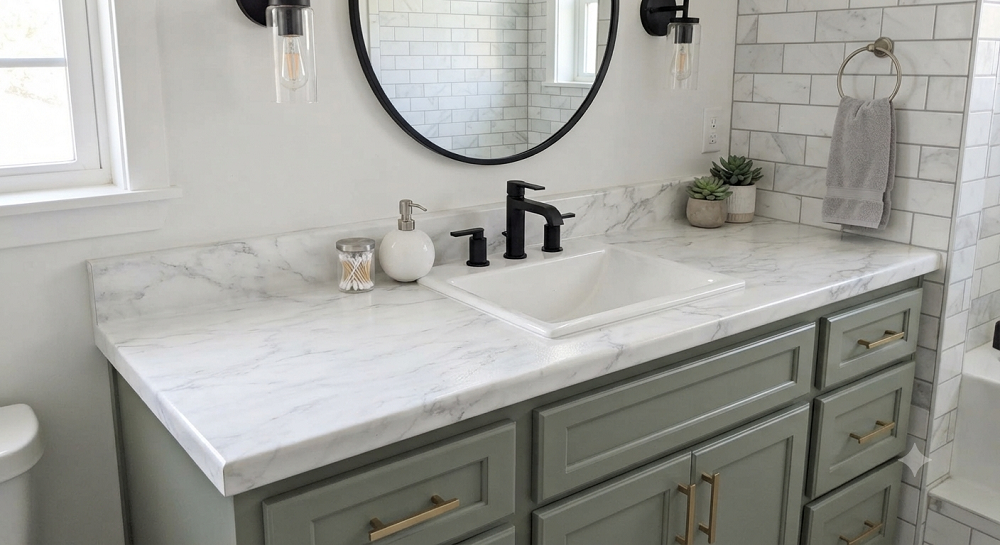
If your existing laminate top isn’t damaged, just ugly, you might not need to replace it at all. A faux stone painting technique can transform a dated laminate counter into something that convincingly mimics marble or granite for the cost of a few specialty paint products.
This is genuinely the cheapest option here, often under $50 total. You’ll need a bonding primer made for laminate, a base coat, artist’s paints or specialty faux-finish kits for the veining, and a durable topcoat sealant. YouTube has plenty of tutorials walking through specific veining techniques, and practicing on a scrap piece of cardboard first will save you a lot of frustration.
I’ll admit this one has the steepest learning curve of anything on this list. Getting realistic-looking veining takes practice, a light hand, and honestly, a bit of an artistic eye. My first attempt at a faux marble finish looked more like a bruise than a countertop, and I had to sand it back and start over.
That said, once you get the technique down, the transformation is dramatic. I’ve seen $50 paint jobs fool houseguests into asking where someone bought their new marble counter.
Real Talk: What Can Go Wrong (and What’s Not Worth It)
Every one of these options has a failure point, and I’d rather tell you upfront than have you find out the hard way.
Butcher block and improperly sealed concrete both fail the same way: water finds the weak spot. If you skip a section during sealing, that’s exactly where the damage starts. Take the extra thirty minutes to double-check your coverage before calling it done.
Peel-and-stick film is a fine short-term fix, but I’ve found that treating it as a permanent solution is a total waste of money. You’ll be replacing it within a couple of years regardless of how carefully you install it, so budget for that reality instead of being surprised by it.
Faux painting techniques are unforgiving of impatience. If you rush the topcoat or skip sanding between layers, you’ll see every brush stroke and the whole illusion falls apart. This is a project for a free weekend, not a Tuesday evening after work.
Quick side note: whatever material you choose, don’t skimp on the sink cutout and edge finishing. A rough or unsealed edge around the sink is where almost every DIY vanity top fails first, regardless of what surface you picked.
Final Thoughts
A tight budget doesn’t mean a boring bathroom. Some of my favorite vanity tops, the ones people actually stop and ask about, cost less than a hundred dollars and a weekend of effort. The fanciest material in the world doesn’t matter if it’s installed carelessly, and a cheap material installed with patience will outlast and outshine it every time.
Pick the option that matches your skill level and your patience, not just your Pinterest board. What’s the current state of your vanity top, and which of these ideas are you tempted to try first? Drop your questions or your own budget vanity wins in the comments below. I read every one.