
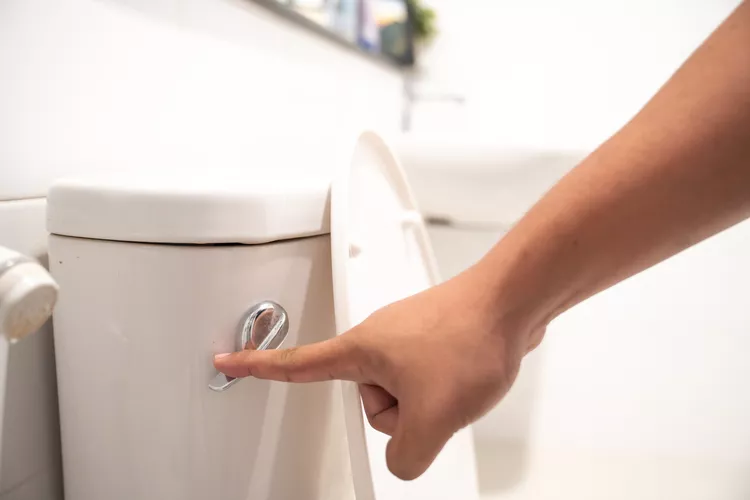
That phantom “hissssss” at 2 a.m. Your toilet, running again, for no reason anyone in the house will admit to causing. You jiggle the handle, it stops for an hour, then it’s back at it like a leaky faucet with a grudge.
I get calls about this one more than almost anything else. A running toilet feels like a small annoyance, but it’s quietly one of the most expensive “minor” problems a house can have. A toilet that won’t shut off can waste anywhere from 200 to a jaw-dropping 2,000 gallons of water a day. That’s not a typo. I’ve seen water bills triple in a single month because of one worn-out part that costs about four dollars.
The good news: fixing a running toilet is one of the most beginner-friendly repairs in the entire home maintenance world. You don’t need a plumbing license, a wrench collection, or a YouTube binge that eats your whole Saturday. You need about 30 minutes, a few basic tools, and this guide.
Let’s get your toilet quiet again.
Why Your Toilet Keeps Running: The Usual Suspects
Before you start swapping parts randomly (please don’t, that’s how I ended up with a drawer full of mismatched flappers back in my early fixer-upper days), it helps to know what’s actually going on inside that tank.
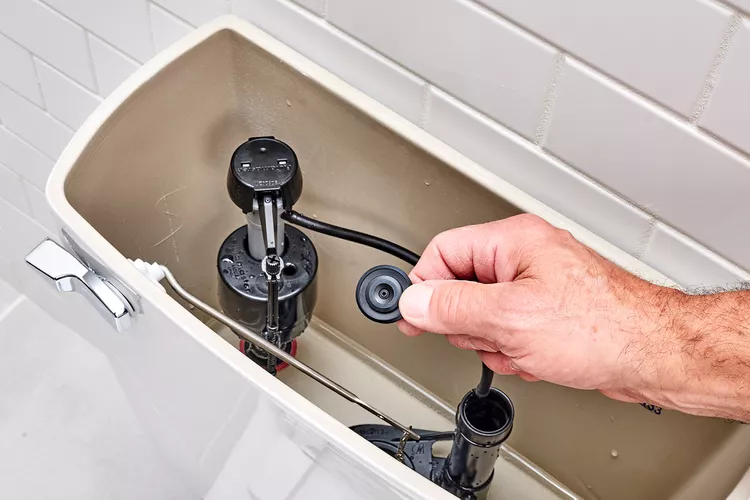
A toilet runs when water keeps flowing into the bowl or tank after a flush is done. There are really only four parts that cause 95% of running toilet problems:
- The flapper – the rubber seal at the bottom of the tank that lifts when you flush
- The fill valve – the tall tube that refills the tank after flushing
- The float – the part that tells the fill valve when to stop
- The overflow tube – the tube in the middle of the tank that water shouldn’t be pouring into
Pop the tank lid off, flush, and just watch what happens for a minute. Nine times out of ten, you’ll catch the culprit red-handed just by observing.
How to Diagnose a Running Toilet in Under 5 Minutes
Here’s my go-to test, and it costs nothing: the food coloring trick.
- Take the lid off the tank
- Add a few drops of food coloring to the tank water (not the bowl)
- Wait 10-15 minutes without flushing
- Check the bowl
If color shows up in the bowl, your flapper isn’t sealing right and water is sneaking past it. If the water level in the tank is above the overflow tube, your fill valve or float is the problem. This one test alone tells you exactly which fix you need, which saves you from buying parts you don’t need.
I always tell people to do this test before touching anything else. Guessing wastes time and money, and hardware store trips add up fast when you’re going back for the “right” part three times in one weekend.
Fixing a Worn-Out Flapper (The Most Common Fix)
The flapper is rubber, and rubber degrades. Over a few years, it warps, cracks, or gets coated in mineral buildup that stops it from sealing flush against the valve seat. This is the cause behind most running toilets I’ve fixed, hands down.
What you’ll need: A replacement flapper (universal ones run $5-10, but check your toilet brand first)
Steps:
- Turn off the water supply valve behind the toilet, then flush to drain the tank
- Unhook the flapper chain from the flush lever
- Unclip or slide the old flapper off the overflow tube pegs
- Install the new flapper the same way, matching the height to your old one
- Reconnect the chain with just a little slack, about half an inch of give
- Turn the water back on and test flush a few times
Quick side note: chain length matters more than people think. Too tight, and the flapper can’t seal all the way, which means it’ll run constantly. Too loose, and the chain can get caught under the flapper, which causes the exact same problem. I’ve fixed “broken” toilets twice in one visit just by adjusting three links of chain.
Flappers are cheap, and honestly, I replace mine proactively every 3-4 years now instead of waiting for it to fail. That’s a lesson I picked up after ignoring a slow leak for months and watching my water bill creep up fifteen bucks at a time.
Adjusting or Replacing the Fill Valve
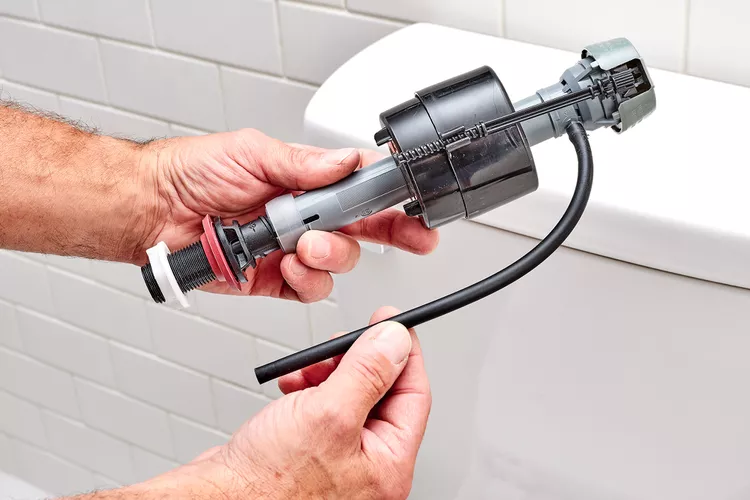
If your water test showed the tank water sitting above the overflow tube, or if you hear that constant faint trickle even when the flapper looks fine, the fill valve is your problem.
The fill valve controls how much water fills the tank after a flush. When it fails, it either won’t shut off completely, or it lets water dribble in nonstop.
Adjusting the float (cheapest fix):
- Locate the float, either a ball on an arm or a cup that slides up and down the fill valve
- Lower the water level by adjusting the float down slightly. For ball floats, bend the arm down gently. For cup floats, pinch the clip and slide it down
- The water level should sit about an inch below the top of the overflow tube
- Test flush and check the new water level
Replacing the entire fill valve (if adjusting doesn’t work):
- Shut off the water and drain the tank completely
- Disconnect the water supply line from the bottom of the valve
- Unscrew the mounting nut underneath the tank and lift the old valve out
- Insert the new valve, adjusting the height per the package instructions
- Reconnect the supply line and hand-tighten, then a quarter turn more with a wrench
- Turn water back on and test
I’m opinionated about this one: don’t bother trying to repair an old ballcock-style fill valve with the metal arm and ball float. They’re ancient technology at this point, and I’ve found that replacing the whole unit with a modern adjustable fill valve is a total no-brainer. It costs maybe $12 more and takes the same amount of time as fiddling with a rusted-out old one.
Fixing an Overflow Tube That’s Too Tall or Too Short
This one gets missed constantly. If your overflow tube is cut too short, or the fill valve is set too high, water pours directly into the tube and down the drain nonstop, even though everything else looks totally normal.
The fix is simple: the water level needs to sit about 1 inch below the top of the overflow tube. If it’s higher than that, lower your float setting using the steps above. If the tube itself looks cracked or damaged, most fill valve replacement kits include a new overflow tube, so you’ll likely fix both issues at once.
When the Handle Itself Is the Problem
Sometimes it’s not the tank internals at all, it’s the handle and lever arm. If the handle sticks down after flushing, or the lever arm inside the tank is bent or corroded, the flapper gets held open even after the flush cycle should be done.
- Check if the handle moves freely up and down without sticking
- Open the tank and watch the lever arm during a flush, it should snap back to resting position immediately
- If the arm is bent, gently bend it back into shape
- If the handle mounting nut is loose (it’s reverse-threaded, so lefty-tighty on this one), tighten it up
- Replace the entire handle assembly if it’s rusted or cracked, they run about $10
Real Talk: What’s Not Worth the Hassle
Here’s where I get honest with you, because not everything about toilet repair is a fun weekend project.
- Universal flapper kits aren’t always universal. I’ve watched people install a “universal” flapper on an older American Standard or Kohler toilet and end up with a worse leak than before because the seal geometry doesn’t match. If your toilet is more than 15 years old or a less common brand, look up the exact model number before buying parts. It’s printed inside the tank, usually near the water line.
- Don’t overtighten anything plastic. The mounting nuts on fill valves and supply lines are almost always plastic or have plastic components. I cracked a brand-new fill valve nut once by cranking it down with a wrench like I was working on a car engine. Hand-tight plus a quarter turn is plenty. If it’s still leaking after that, the problem is a bad seal, not a loose nut, so stop cranking.
- Skip the tank tablets and bluing drop-ins. I know they’re marketed as convenient, but those chlorine or bleach tablets sitting in your tank will eat through rubber flappers and gaskets way faster than normal wear. I’ve replaced flappers in six months flat on toilets where someone was using drop-in tablets. If you want a fresh-smelling toilet, treat the bowl directly instead of the tank.
- Know when to call it. If you’ve replaced the flapper, fill valve, and adjusted everything, and it’s still running, the problem might be a cracked tank, a bad flush valve seat, or mineral buildup so bad the valve seat itself needs resurfacing. At that point, you’re better off calling a plumber than replacing your third fill valve in a month. There’s no shame in it. I still call an electrician for anything involving my breaker panel, we all have our lanes.
How Much a Running Toilet Actually Costs You
I mentioned earlier that a running toilet can waste up to 2,000 gallons a day, and I want to put a real number on that because it changes how urgently people treat this repair.
The average US household pays somewhere between $0.004 and $0.01 per gallon of water, depending on your city and rate tier. That sounds tiny until you do the math on a toilet running non-stop for a month. A moderate leak, say 200 gallons a day, adds up to 6,000 gallons a month. At even a conservative rate, that’s an extra $30-60 tacked onto your water bill for a problem you could fix in an afternoon with parts from the hardware store.
I had a client a few years back who assumed her water bill had just gone up because of “inflation” for three straight months before she called me. Turned out her fill valve had been slowly failing the entire time. The fix cost her twelve dollars in parts. The three months of ignoring it cost her almost two hundred.
If your water bill has crept up and you can’t explain why, check your toilets before you blame the utility company. It’s the first thing I check in my own house whenever a bill looks off.
Preventing a Running Toilet Before It Starts
Fixing the problem once is good. Not dealing with it again in eighteen months is better. Here’s how I keep my own toilets from turning into repeat offenders:
- Swap flappers every 3-4 years, even if they look fine. Rubber degrades slowly and you won’t notice the wear until it’s already leaking.
- Skip the tank drop-in tablets. I covered this above, but it’s worth repeating because it’s the single easiest way people accidentally shorten the life of their own flapper.
- Check your water level after any plumbing work. If a plumber or handyman has been in your tank for any reason, glance at the water line before they leave. A bumped float is an easy thing to miss.
- Listen for the toilet at night. Houses are quiet after everyone’s asleep, and that’s usually when I first notice a faint hiss I missed during the day. If something sounds off, check it that weekend instead of putting it off.
- Bonus tip: keep a spare flapper and fill valve on hand if you own an older home. They’re cheap, they don’t expire, and having the part already in the house means you fix the problem the same day instead of living with a running toilet for a week while you wait to get to the store.
None of this requires a maintenance schedule taped to your wall. It’s just a few habits that catch small problems before they become water bill problems.
Frequently Asked Questions
Why does my toilet run for a few seconds every hour, even when nobody’s used it? This is almost always a slow flapper leak. Water is seeping past the seal a little at a time, the tank level drops just enough to trigger the fill valve, and it tops itself back off. It’s called “ghost flushing,” and a new flapper fixes it in the vast majority of cases.
Is it normal for a toilet to run for 30 seconds after flushing? Yes, that’s completely normal, that’s just the tank refilling. The problem is when it keeps going well past that, or when it never fully shuts off.
Can a running toilet cause water damage? Directly, no, since the water is going down the drain. But a failing flapper or supply line can sometimes lead to slow leaks around the base or tank bolts, so it’s worth checking those areas for moisture while you’re in there fixing the main issue.
Do I need to replace the whole toilet if it keeps running? Almost never. Running toilets are a parts problem, not a whole-toilet problem, in the overwhelming majority of cases. I’d only recommend replacement if the tank itself is cracked or the toilet is decades old and parts are no longer made for it.
Tools and Parts Checklist
- Adjustable wrench
- Sponge or towel for tank water
- Replacement flapper (know your toilet brand first)
- Replacement fill valve if adjusting doesn’t fix it
- Food coloring for diagnostics
Final Thoughts
A running toilet is one of those problems that feels bigger than it is right up until you actually open the tank lid and look inside. Most of the time, you’re looking at a five-dollar rubber flapper standing between you and a quiet bathroom and a normal water bill.
Do the food coloring test first, always. It’ll save you a wasted trip to the hardware store and a lot of guessing.
Have you run into a running toilet that turned out to be something weirder than a flapper or fill valve? Drop it in the comments below, I read every one, and I’d love to hear what fixed it for you.