
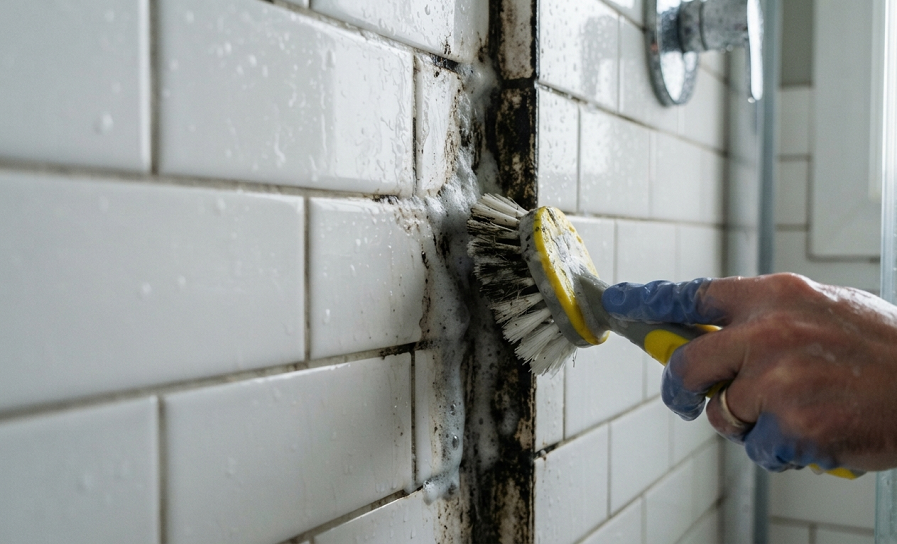
You turn on the shower light, glance down at the tile lines, and there it is: that creeping black stuff that definitely wasn’t there last month. Now you’re standing in your own bathroom wondering if you should just call a health inspector.
I get it. Black grout lines make an otherwise clean bathroom look like a crime scene. And the worst part? You can scrub with a regular sponge for twenty minutes and barely make a dent, because grout is porous and that black gunk has settled in deep.
The good news is that black grout is almost always fixable without ripping out your whole shower. The bad news is that generic all-purpose sprays and a paper towel aren’t going to cut it. You need the right method, the right tools, and a little patience.
My neighbor Denise once tried to power through her grout with a magic eraser and a prayer. Two hours later she had raw knuckles and grout that was still gray-black in the corners. That’s the kind of mistake I want to save you from.
What Is That Black Stuff in My Grout, Anyway?
Before you start scrubbing, it helps to know what you’re actually dealing with. Black grout discoloration usually comes from one of three culprits:
- Mold and mildew. This is the most common cause, especially in showers that don’t get enough airflow. Grout is basically a sponge for moisture, and mold loves a warm, damp, dark environment. If the black spots look fuzzy or slightly raised, you’re probably dealing with mold.
- Mineral and soap buildup gone dark. Hard water deposits mixed with soap scum and body oils can oxidize over time and turn a dingy gray-black. This is more common along the shower floor and in high-traffic spots like right under the shower head.
- Just old, dirty, unsealed grout. Grout that was never sealed (or hasn’t been resealed in years) absorbs dirt and grime like a chalkboard absorbs chalk dust. It’s not always mold. Sometimes it’s just years of buildup with nowhere to go.
Here’s a quick way to tell the difference: dab a little hydrogen peroxide on the grout. If it fizzes and lightens up fast, you’re mostly dealing with mold or mildew. If it barely changes, you’re probably looking at mineral staining or plain old dirt.
How to Clean Black Mold Out of Shower Grout
If mold is your main problem, this is the method I reach for first, every single time.
Step 1: Ventilate the Bathroom
Crack a window, turn on the exhaust fan, or prop the door open. You’re about to use some strong-smelling stuff, and mold spores don’t need help traveling further into your lungs than they already have.
Step 2: Make a Baking Soda Paste
Mix baking soda with just enough water to form a thick paste, roughly the consistency of toothpaste. This isn’t glamorous, but baking soda is mildly abrasive and alkaline, which makes it genuinely effective at breaking down grime without scratching your tile.
Step 3: Apply and Let It Sit
Spread the paste directly onto the grout lines with an old toothbrush or a grout brush. Let it sit for at least 15 minutes. I like to do this right before I leave for work so it has hours to work on the stains instead of minutes.
Step 4: Spray with Vinegar
Fill a spray bottle with plain white vinegar and mist it over the baking soda paste. It’ll foam up, which is oddly satisfying and also a sign the acid is breaking down mineral deposits and lifting grime out of the pores.
Step 5: Scrub in Small Circles
Once the fizzing calms down, scrub the lines using a stiff-bristled grout brush. Small circular motions work better than back-and-forth scrubbing because they dig into the texture of the grout instead of just skimming the surface.
Step 6: Rinse Thoroughly
Rinse with hot water and check your work. For moderate mold, this baking soda and vinegar combo usually gets grout looking dramatically better in one pass. For serious, long-standing mold, you might need to repeat the process or step up to oxygen bleach.
Quick side note: don’t mix vinegar with actual bleach. That combination creates chlorine gas, which is genuinely dangerous. Pick one acid-based or one bleach-based method and stick with it for that session.
Using Oxygen Bleach for Deep-Set Black Grout Stains
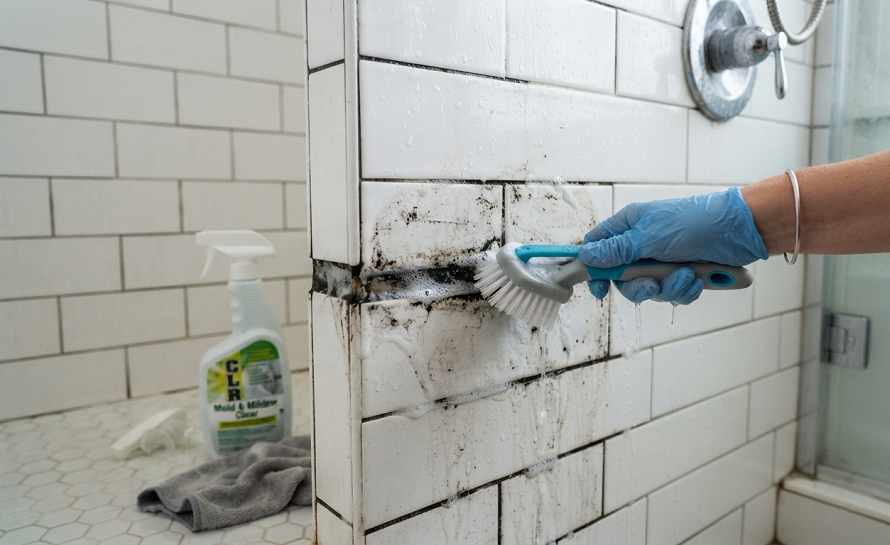
When baking soda and vinegar aren’t strong enough, I bring out oxygen bleach (the powder kind, like OxiClean or a similar brand). This stuff is a workhorse for grout that’s been neglected for years.
Mix the oxygen bleach powder with warm water according to the package directions, usually a few scoops per cup of water, until it forms a paste. Oxygen bleach releases oxygen ions when it’s activated by water, and those ions break apart organic stains at a molecular level. That’s a fancy way of saying it eats through mold, mildew, and old grime without the harsh fumes of chlorine bleach.
Spread the paste over the grout and, this part matters, cover it with plastic wrap. Covering it keeps the paste from drying out too fast, which gives it more time to actually work instead of just sitting there looking helpful. Let it sit for a full hour, or even overnight for really stubborn spots.
Peel back the plastic, scrub with your grout brush, and rinse well. I’ve used this method on grout that looked genuinely beyond saving and watched it come back to nearly its original color. It’s slower than the vinegar method, but it’s also gentler on your tile finish and safe to use around most types of natural stone (always check your specific stone type first, since marble and some limestone can be sensitive to any acidic or alkaline cleaner).
When to Use Chlorine Bleach on Shower Grout
I’ll be honest: chlorine bleach is the nuclear option, and I don’t reach for it often. But for grout that’s black with mold and nothing else is touching it, a diluted bleach solution can be the tool that finally wins.
Mix one part bleach with three parts water in a spray bottle. Ventilate the room like your life depends on it, because with bleach fumes, it kind of does. Spray the solution directly onto the grout lines, avoiding contact with any colored tile or grout, since bleach can lighten colored grout unevenly.
Let it sit for 10 minutes, no longer, then scrub with a brush and rinse thoroughly. Bleach is fast and effective against mold, but it doesn’t actually remove buildup the way baking soda or oxygen bleach does. It just kills the mold and bleaches the color. That means the black can come back faster if you don’t also address moisture and ventilation.
I’d save bleach for a last resort, or for grout that’s already sealed and in decent shape but just has a mold problem you need gone today.
Steam Cleaning: The Lazy Person’s Secret Weapon
If you own a handheld steam cleaner, or you’re thinking about buying one, this might become your favorite grout tool. Steam cleaners blast pressurized hot vapor into the grout lines, loosening dirt and killing mold on contact without any chemicals at all.
Run the steam nozzle slowly along each grout line, giving it a few seconds per section. Follow up immediately with a scrub brush while the grout is still hot and loosened, then wipe away the grime with a microfiber cloth.
I bought a cheap steam cleaner a couple years back mostly out of curiosity, and it’s become one of those tools I recommend to basically everyone with tile floors or a tiled shower. No chemical smell, no runoff to rinse, and it works on sealed and unsealed grout alike. The only downside is the upfront cost, and the fact that it takes a bit longer than a spray-and-scrub session.
Commercial Grout Cleaners Worth Considering
I’m generally a DIY-first person, but sometimes a specialized commercial cleaner genuinely outperforms homemade mixes, especially for grout that’s black in patches all over a large shower.
Go for gel-based grout cleaners rather than thin liquid sprays. Gel formulas cling to vertical grout lines instead of running down into the tub, which means more contact time and better results. Apply according to the label, usually letting it sit 5 to 10 minutes, then scrub and rinse.
I’ve had good results with cleaners built around hydrogen peroxide or oxygen bleach as the active ingredient rather than straight chlorine bleach. They tend to be less harsh on the surrounding caulk and less likely to discolor colored grout unevenly.
Tools That Actually Make a Difference
A regular toothbrush works in a pinch, but if you’re cleaning grout regularly, a few small upgrades save a ton of effort.
- A stiff nylon grout brush with an angled head gets into corners a toothbrush just can’t reach.
- An electric spin scrubber (the kind that looks like a cordless drill with a brush head) cuts scrubbing time by more than half. This was a genuine game-changer for me the first time I used one.
- Microfiber cloths for the final wipe-down leave less lint and streaking than paper towels.
- A small handheld vacuum or a squeegee for post-shower drying, which sounds excessive until you realize how much it slows down future grime buildup.
How to Keep Black Grout from Coming Back
Cleaning grout once feels great. Cleaning it every single month because it keeps coming back is exhausting, and honestly, that’s the situation most people are actually trying to escape.
- Improve your ventilation. Run the exhaust fan during every shower and for at least 20 minutes after. If you don’t have a working fan, that’s genuinely your first upgrade to make, before you buy another cleaner.
- Squeegee the walls after every shower. I resisted this for years because it felt like an extra chore, but it takes about 30 seconds and dramatically cuts down on standing moisture, which is the number one thing mold needs to thrive.
- Seal your grout. Unsealed grout is basically an open invitation for mold and staining. A penetrating grout sealer takes an afternoon to apply and can protect your grout for one to two years, depending on the product and how much traffic your shower gets.
- Wipe down weekly with a light cleaner. You don’t need to deep clean every week, but a quick spray of diluted vinegar or a mild all-purpose cleaner keeps buildup from ever reaching that deep, stubborn black stage.

Real Talk: What’s Not Worth the Effort
Not every black grout situation is worth fighting. Here’s where I’d stop scrubbing and start planning something bigger.
If the grout is crumbling, cracked, or coming away from the tile in chunks, no amount of cleaning is going to fix that. At that point you’re not cleaning grout, you’re just polishing damage. Regrouting a shower isn’t a huge project, but it is a real one, and trying to clean your way out of structural grout failure is a waste of a Saturday.
If black spots keep appearing behind the same section of tile no matter how well you clean and ventilate, there’s a real chance you’ve got mold growing behind the tile itself, not just in the surface grout. That’s a job for a contractor, not a spray bottle. I say this as someone who once spent three weekends scrubbing a spot that kept coming back, only to find out later there was a slow leak behind that exact wall.
And here’s an opinion that might ruffle some feathers: I think grout paint and grout pens are mostly a waste of money for black mold situations. They can make stained grout look better for photos, but they don’t kill what’s underneath, and mold can actually grow on top of the coating if moisture is still an issue. If your grout is structurally fine and just discolored, a real clean or a proper sealer beats a cosmetic pen every time.
Also, skip the “magic eraser only” approach for heavy black staining. Magic erasers are fine for light surface grime, but they wear down fast on textured grout and won’t touch anything below the surface. You’ll go through half a pack and still have gray lines.
Parting Wisdom
Black grout looks worse than it usually is, and in most cases, you can bring it back with nothing more exotic than baking soda, vinegar, a good brush, and a little patience. Start gentle, work your way up to stronger methods only if you need to, and don’t skip the ventilation step, because that’s the part that actually keeps the problem from coming back.
What’s your grout situation looking like right now? Drop a comment below and tell me what you’ve tried so far, I’ll do my best to help you figure out your next move.