
That black, fuzzy line creeping along your tub isn’t mold you can scrub away. I know because I spent an entire Saturday morning attacking mine with bleach spray and a toothbrush before I finally accepted the truth: caulk has a shelf life, and mine was long past its expiration date.
If you’re staring at cracked, peeling, or straight-up moldy caulk right now, I’ve got good news. Replacing bathroom caulk is one of the cheapest, fastest home upgrades you can do yourself. No contractor, no permit, no trip to the ER. Just a utility knife, a tube of the right stuff, and about two hours of your time (plus dry time, but we’ll get to that).
I’ve re-caulked more tubs, showers, and sinks than I can count at this point, for my own house and for a rotating cast of neighbors who somehow all found out I “know about caulk” the same summer. Here’s everything I’ve picked up, including the mistakes that cost me redo jobs.
Signs Your Bathroom Caulk Needs to Go
Before you rip anything out, make sure you actually need to. Here’s what tells me a caulk line is done:
- It’s black, pink, or fuzzy. This is mildew or mold growing in the porous surface of old caulk. Once it’s in there, no amount of scrubbing gets it fully out. You can bleach the surface and it’ll look okay for a week, then the color creeps right back.
- It’s cracked or splitting. Caulk flexes with your tub and walls as your house settles and temperatures shift. Eventually it loses that stretch and starts to crack. Cracks let water sneak behind your tile or tub surround, which is exactly what you don’t want.
- It’s peeling away from the surface. If you can slide a fingernail under the edge and lift it, the seal is already broken. Water is getting behind there whether you can see it or not.
- It’s just old. Even caulk that looks fine can be five, six, seven years old and quietly failing. If you don’t remember the last time you caulked your bathroom, that’s usually your answer.
What You’ll Need Before You Start
Don’t make my mistake of starting a project, hitting a wall, and driving to the hardware store in a towel because you ran out of time before your kid’s bath. Grab all of this first:
- A caulk removal tool or a sharp utility knife
- A plastic putty knife or old credit card
- Rubbing alcohol or a caulk-specific remover spray
- Painter’s tape
- A caulk gun (skip the squeeze tubes, they make a mess)
- New caulk — 100% silicone for tubs and showers, painter’s caulk for trim and non-wet areas
- A damp cloth and paper towels
- A small dish of soapy water
Quick side note: buy one extra tube of caulk even if you think you’ll only need one. You will not want to stop mid-project to make another store run, and half-used tubes dry out fast once opened.
Silicone vs. Acrylic Caulk: Which One Do You Actually Need
This trips people up constantly. Here’s the short version.
100% silicone caulk is what you want for tubs, showers, and anywhere that gets wet regularly. It’s flexible, waterproof, and resists mold better than other types. The downside is that it can’t be painted over, and it’s a little trickier to smooth because it’s so slick.
Acrylic latex caulk (sometimes labeled “painter’s caulk”) is better for trim, baseboards, and areas that stay dry. It’s easier to work with and you can paint it to match your walls, but it will not hold up long-term in a wet shower environment. I’ve found that people grab this one because it’s cheaper and easier to apply, and then wonder why their shower caulk fails again in eight months.
If you want the best of both, there’s “siliconized acrylic” caulk on the shelf too. It’s a decent middle ground for areas that get occasional moisture, like around a bathroom sink, but for the actual tub-to-tile line, stick with pure silicone.
How to Remove Old Bathroom Caulk (Step by Step)
This is the part people rush, and rushing here is exactly how you end up with new caulk that looks lumpy and uneven because it’s sitting on top of old residue.
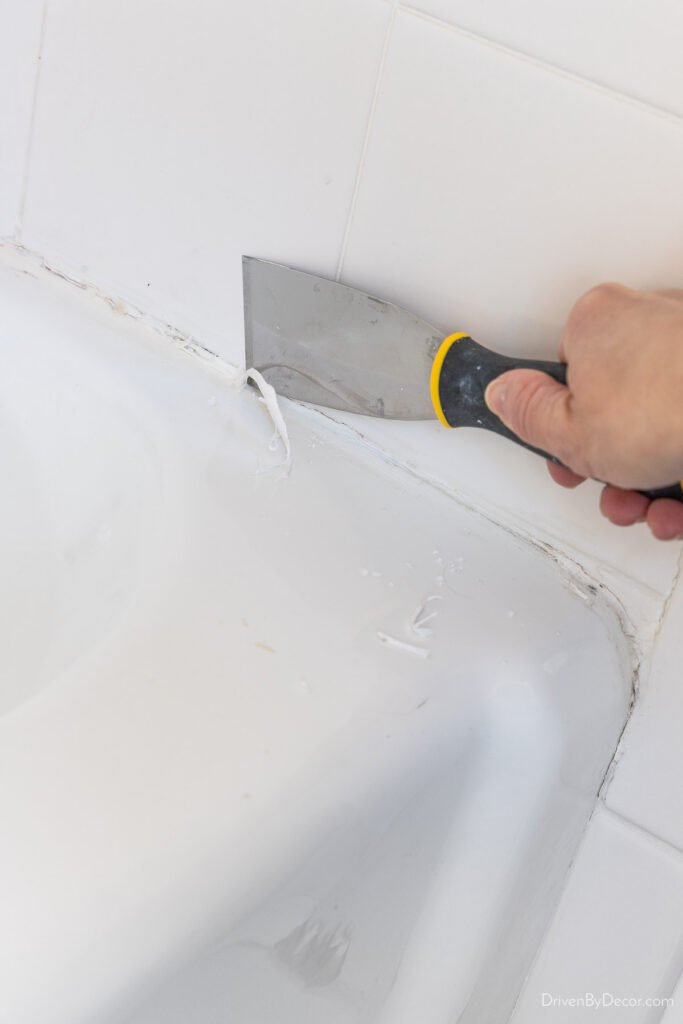
- Score along both edges of the caulk line with your utility knife, running the blade where the caulk meets the tub and where it meets the tile.
- Pry and pull. Use your caulk removal tool or the flat edge of the putty knife to lift the caulk strip out. It usually comes up in chunks or long ribbons if your knife scoring was clean.
- Scrape the leftover residue. There’s almost always a thin film left behind. Keep scraping with the plastic putty knife until the surface feels smooth under your finger, not tacky or ridged.
- Wipe everything down with rubbing alcohol. This step matters more than people think. Alcohol cuts through soap scum and any remaining caulk film that plain water won’t touch.
- Let it dry completely. I mean completely, not “looks dry from three feet away.” Run a fan or open a window for at least an hour. New caulk applied over a damp surface will not bond properly, and you’ll be doing this whole project again in a month.
How to Apply New Caulk Like You Know What You’re Doing
Once your surface is bone dry, you’re ready for the fun part.
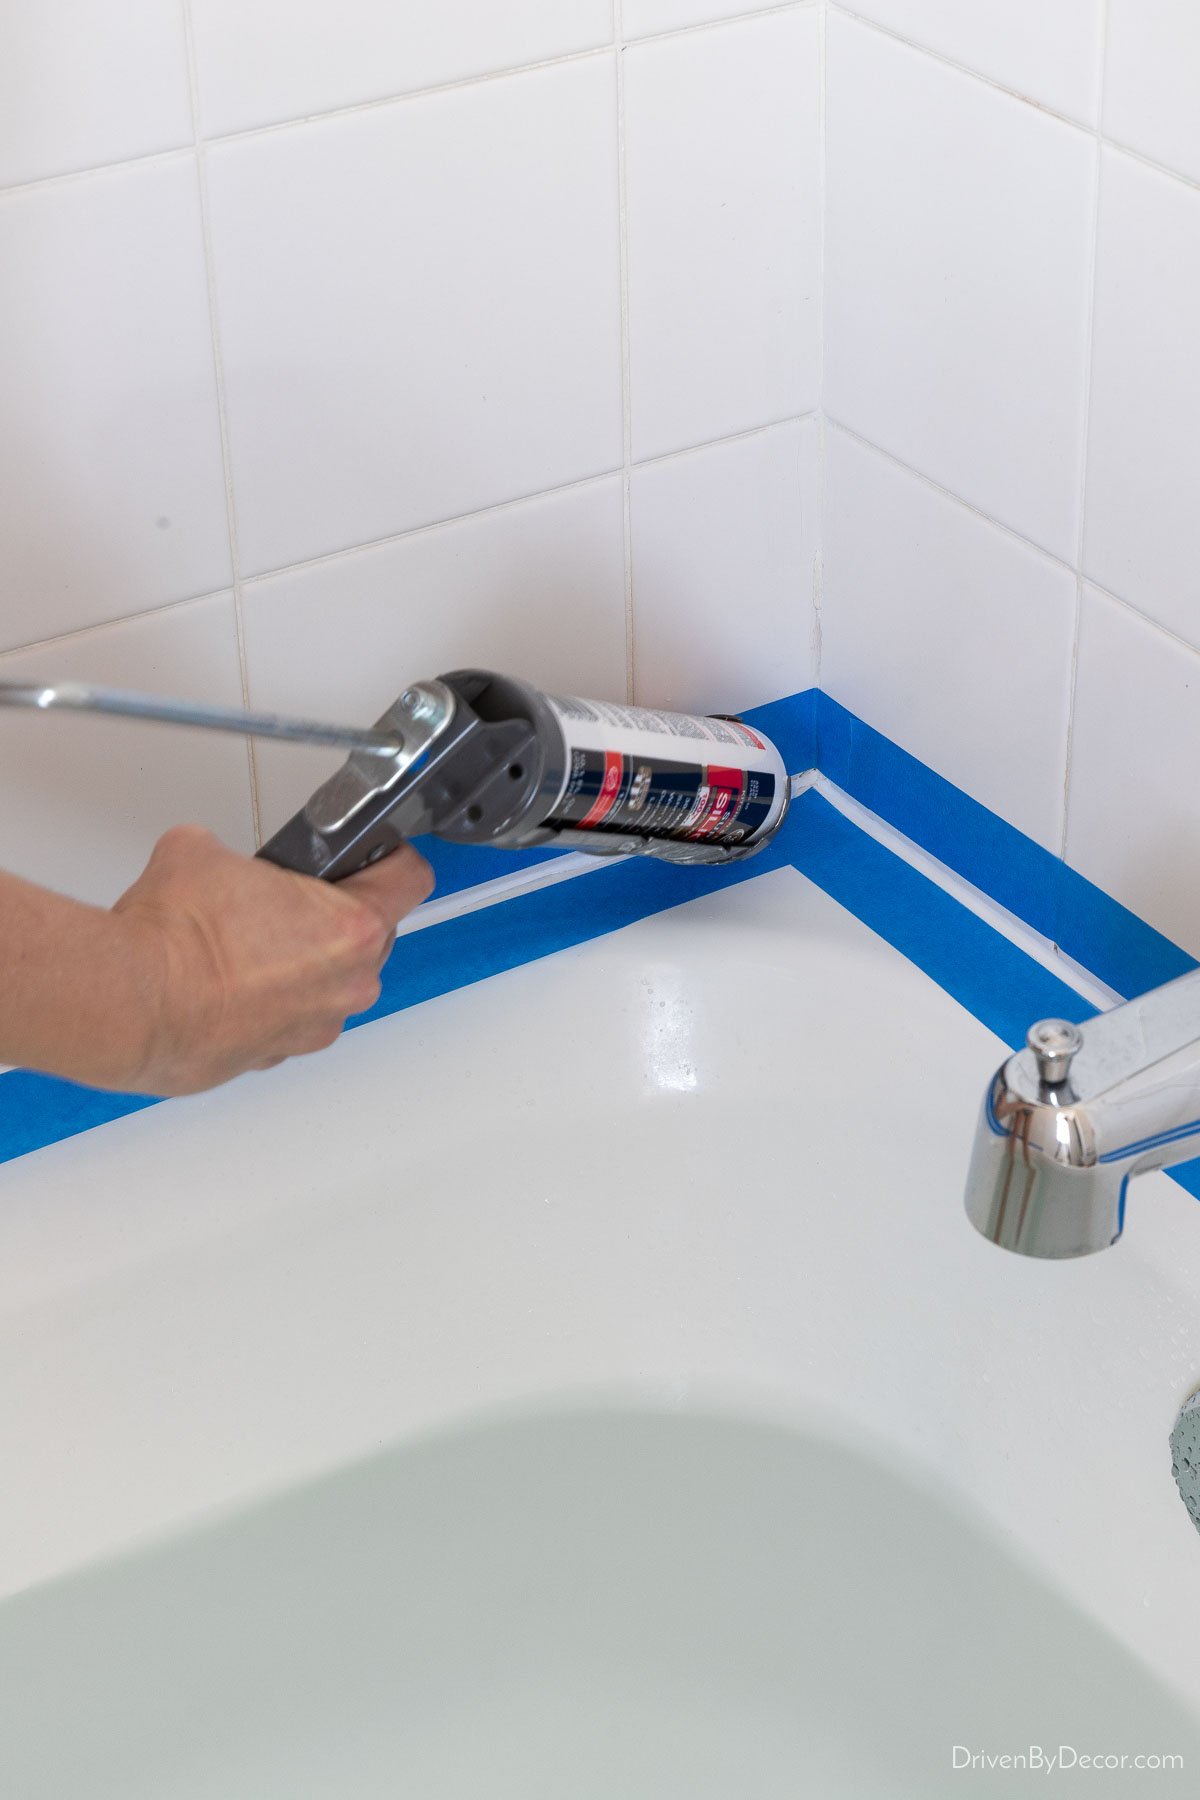
- Tape both sides of the seam. Run painter’s tape along the tub edge and the tile edge, leaving a small gap between the two strips where the caulk line will sit. This is the single biggest trick for getting a professional-looking line, and I ignored it for years because it felt like an extra step. It isn’t optional if you want clean results.
- Cut your caulk tube tip at a 45-degree angle, small opening. You can always cut more off if the bead is too thin, but you can’t undo a hole that’s too big.
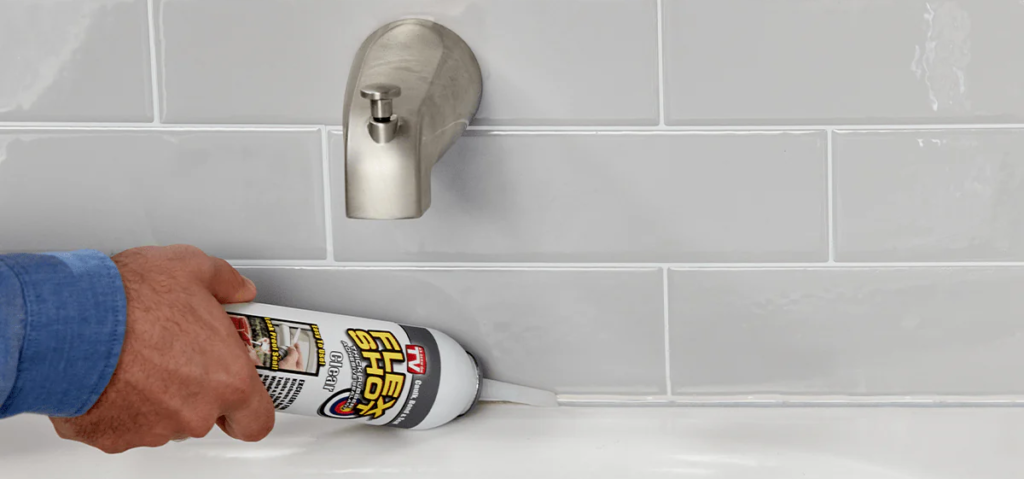
- Load the caulk gun and run a steady bead along the seam in one continuous motion. Don’t stop and start if you can help it. Consistent pressure and steady speed matter more than going slow.
- Smooth the bead immediately. Wet your finger in the soapy water and run it along the caulk line in one smooth pass, applying light pressure. Wipe your finger on a paper towel between passes so you’re not just moving excess caulk around.
- Pull the tape while the caulk is still wet. Peel it away at a 45-degree angle, slowly, right after you smooth the bead. If you wait until it skins over, you’ll pull up chunks of your nice new line along with the tape.
- Let it cure per the label, usually 24 hours before any water touches it. I know that means no shower in your own bathroom for a day. Use the other one, or shower at the gym. It’s worth it.
Getting That Clean, Straight Caulk Line Every Time
A few things that separate a decent job from one that looks like it came out of a magazine:
- Keep your finger pressure even the entire length of the bead. Speeding up or slowing down mid-pass creates visible ridges.
- Work in sections shorter than your arm’s reach if the tub is long. Trying to smooth an entire six-foot line in one swipe usually means the far end skins over before you get to it.
- Don’t overfill the gap. A thin, tight bead looks cleaner and lasts just as long as a thick one. More caulk isn’t a stronger seal, it’s just more caulk.
How Often Should You Actually Re-Caulk a Bathroom
I get asked this constantly, and the honest answer is “it depends on your bathroom,” but I can give you a real number to work with. Most silicone caulk in a shower or tub holds up somewhere between three and five years before it starts breaking down. Bathrooms with poor ventilation, no exhaust fan, or heavy daily use tend to land on the shorter end of that range.
A few things that shorten caulk’s lifespan faster than normal:
- Steamy showers with no fan running to clear the moisture out
- Letting standing water sit in the tub-to-tile corner after every bath
- Using harsh abrasive cleaners that eat away at the caulk surface over time
- A house that shifts or settles more than average, which stresses the seal
If your bathroom checks a couple of those boxes, don’t wait for visible mold to show up. Check the caulk line every six months or so by pressing on it gently. If it feels stiff instead of slightly flexible, it’s already on its way out even if it still looks fine.
What Replacing Bathroom Caulk Actually Costs
This is one of those rare home projects where the price tag is almost embarrassingly low. A quality tube of 100% silicone caulk runs somewhere between $6 and $12 depending on the brand. A basic caulk gun, if you don’t already own one, is another $8 to $15. Add a roll of painter’s tape for a few dollars and a bottle of rubbing alcohol you probably already have under the sink, and you’re looking at a total cost under $30 for most standard bathrooms.
Compare that to what a contractor charges for the same job, which around most areas runs anywhere from $150 to $400 depending on your tub size and how much old caulk needs to be removed first. That price gap is exactly why I tell people this is one of the first DIY skills worth learning, even if you’re not naturally handy. The tools are cheap, the learning curve is short, and a bad first attempt costs you a wasted tube of caulk, not a wasted afternoon of a contractor’s time.
If your bathroom has multiple wet areas, like a separate shower stall and a soaking tub, budget for two tubes instead of one. Trying to stretch a single tube across two full seams usually means running out three-quarters of the way through the second line, which is not a fun moment to discover you’re short.
Tools That Make the Job Genuinely Easier
Beyond the basic list, a couple of extras have saved me real time and frustration over the years.
- A caulk finishing tool. These little plastic or silicone tools cost about five dollars and come with a few different tip shapes. They give you a more consistent bead than a finger alone, especially in corners where two caulk lines meet. My finger still works fine for straight runs, but corners are where the finishing tool earns its keep.
- A heat gun or hair dryer for stubborn old caulk. If your existing caulk is really stuck and won’t lift with a putty knife alone, a few seconds of warm air softens it up considerably. Don’t overdo it, you’re just trying to soften the adhesive, not melt anything.
- Extra rags. More than you think you need. Caulk residue on your hands transfers to everything you touch, and I’ve ended up with fingerprints on a bathroom door handle more than once because I didn’t have a rag within reach.
Real Talk: What Actually Goes Wrong
Here’s where I get honest about the stuff nobody tells you before you start.
- You will probably mess up the first line. Even people who’ve done this a dozen times sometimes get a section that looks off. The fix is easy: while it’s still wet, just wipe it off with a paper towel and redo that section. Once it dries, though, you’re cutting it out and starting over.
- Painting over silicone caulk doesn’t work. I’ve tried it, friends have tried it, it always peels. If you need a caulk line that matches your wall color, use acrylic in that spot, not silicone.
- Caulking over mold instead of removing it is a waste of a tube. I get why people are tempted to skip the scraping step when the old caulk looks mostly fine except for one bad patch. Don’t. Mold spores under a new caulk layer will work their way back through eventually, and you’ll have wasted your time and money.
- Rushing the dry time is the number one reason re-caulking fails. If you use the shower before the caulk fully cures, water gets into a bead that hasn’t set yet and it never bonds right. It’ll look fine for a week or two, then start pulling away. Patience here saves you from doing the whole project again next month.
- Cheap caulk guns are genuinely worth avoiding. A flimsy dollar-store gun with an inconsistent trigger pull will fight you the entire time and give you an uneven bead no matter how steady your hand is. Spend the extra few dollars on a mid-range one with a smooth ratchet mechanism.
Final Thoughts
Re-caulking your bathroom isn’t glamorous, and it’s never going to be the home project you brag about at a dinner party. But it’s one of the few upgrades that costs under $15, takes an afternoon, and genuinely protects your home from water damage down the line. A cracked or moldy caulk line isn’t just ugly, it’s a slow leak waiting to happen behind your walls.
Grab a tube this weekend, tape off your lines, and give your bathroom the fresh, clean edge it’s been missing. Your future self, dealing with zero water damage repairs, will thank you.
Have you tackled a re-caulking project before, or is this your first time picking up a caulk gun? Drop your questions or your own hard-won tips in the comments below. I read every one.